This article contains affiliate links. We may earn a commission if you book through them, at no extra cost to you.
Dinner feels a long way off when the tent still needs putting up and the ingredients are buried at the bottom of the cooler. That’s when a meal you can heat in one pot—or assemble without cooking—earns its place on the menu.
These camping food ideas give you options for different parts of the trip: quick breakfasts before a hike, lunches that leave the stove free, satisfying dinners, and a few treats for the evening. Each includes quantities, equipment, and practical instructions, so you can choose what fits your plans.
Most suit car camping with a cooler and basic cookware. For backpacking, focus on the lighter meals built around oats, couscous, noodles, nut butter, and shelf-stable pouches.
Recipe note: Unless stated otherwise, quantities serve two adults. Cooking times are estimates, not results from firsthand testing. Wind, cookware, stove output, and campfire heat affect timing.
Compare All 25 Camping Food Ideas
Times include preparation and cooking at camp, assuming any suggested home preparation is complete.
| # | Food idea | Estimated camp time | Main equipment | Cooler needed? |
|---|---|---|---|---|
| 1 | Potato and egg breakfast burritos | 20–30 minutes | Covered skillet | Yes |
| 2 | Apple and peanut butter oatmeal | 5–10 minutes | Pot | No, with dried fruit |
| 3 | Blueberry pancakes | 15–20 minutes | Skillet, bowl, spatula | For fresh berries |
| 4 | Pepper and potato breakfast hash | 20–25 minutes | Covered skillet | Yes |
| 5 | Yogurt and granola bowls | 5 minutes | Bowls and spoons | Yes |
| 6 | Egg and cheese English muffins | 10–15 minutes | Skillet and spatula | Yes |
| 7 | Chickpea salad wraps | 10 minutes | Bowl, fork, can opener | For cut produce or prepared filling |
| 8 | Tuna and white bean salad | 5–10 minutes | Bowl and can opener | No, if opened and eaten immediately |
| 9 | Hummus and vegetable pitas | 5–10 minutes | Knife and board | Yes |
| 10 | Peanut butter banana wraps | 5 minutes | Spreading knife | No |
| 11 | Black bean quesadillas | 10–15 minutes | Skillet and spatula | Yes |
| 12 | Lemon pasta salad | 2 minutes | Serving spoon | Yes |
| 13 | Sausage and potato foil packets | 25–35 minutes | Foil, grate, tongs | Yes |
| 14 | Black bean chili mac | 20–25 minutes | Covered pot | No, without cheese |
| 15 | Coconut chickpea curry | 20–25 minutes | Pot; second pot helpful | No, with shelf-stable ingredients |
| 16 | Skillet flatbread pizzas | 15–20 minutes | Covered skillet | Yes |
| 17 | Warm bean walking tacos | 10–15 minutes | Small pot | For cheese and cut toppings |
| 18 | Lemon chickpea couscous | 10–15 minutes | Pot and fork | No, if prepared and eaten immediately |
| 19 | Halloumi and pepper pitas | 15–20 minutes | Skillet | Yes |
| 20 | Make-ahead chili | 15–25 minutes when thawed | Pot and spoon | Yes |
| 21 | Peanut noodles with cabbage | 15 minutes | Pot and small bowl | For shredded cabbage |
| 22 | Smoky lime corn | 15–20 minutes | Grate and tongs, or skillet | For prepared kernels or butter |
| 23 | Salty-sweet trail mix | Ready to eat | None | No |
| 24 | Cinnamon apples with granola | 15–20 minutes | Covered skillet | For butter; use oil to avoid it |
| 25 | Chocolate banana boats | 10–15 minutes | Foil and tongs, or skillet | Usually no; check topping labels |
“No cooler” assumes unopened shelf-stable ingredients, suitable whole produce, and immediate consumption after preparation. Follow individual package instructions.
Before choosing fire-dependent meals, check your destination’s current restrictions. Local rules can affect campfires, charcoal, and stove use. The National Park Service’s camp-cooking guide also explains why cooking methods and wildlife-safe storage need planning.
Camping Breakfast Ideas
1. Make-Ahead Potato and Egg Breakfast Burritos
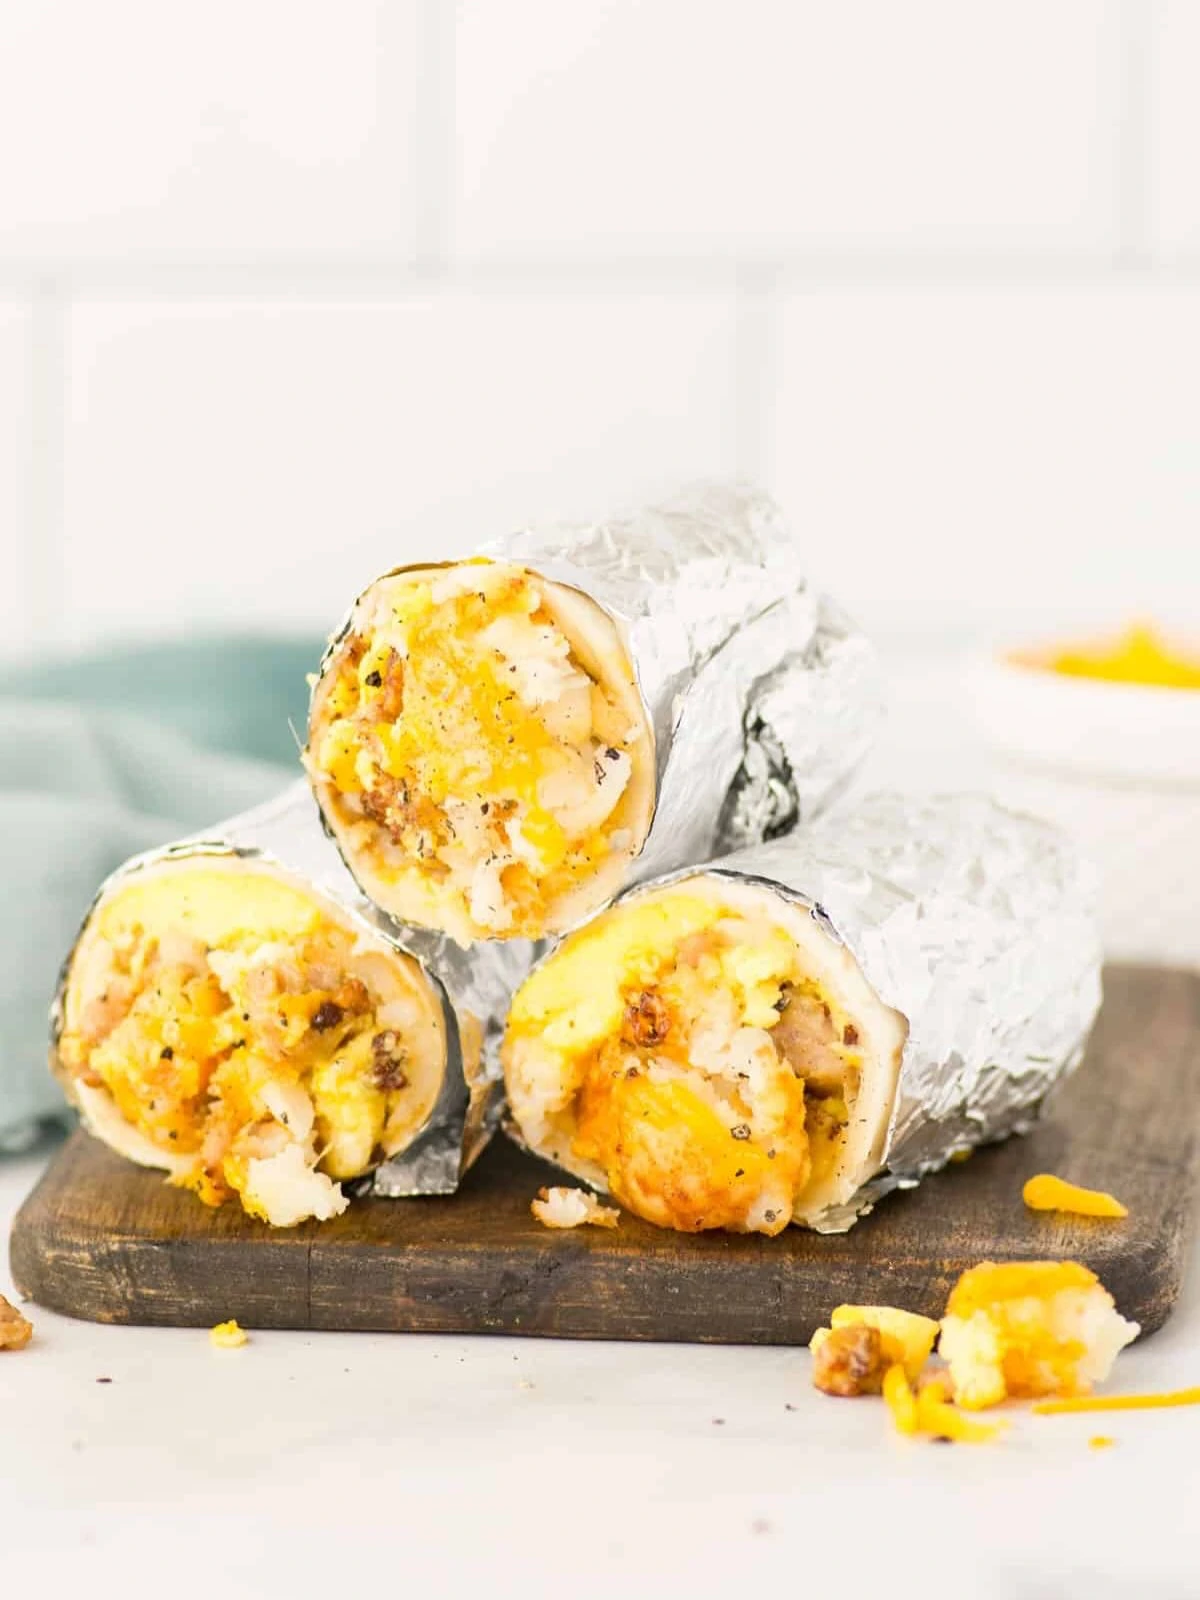
These are useful when you want a substantial breakfast without chopping ingredients at camp.
Ingredients: 2 large flour tortillas, 3 eggs, 1 cup small cooked potato cubes, ½ cup shredded cheddar, 1 teaspoon oil, and ¼ cup salsa.
At home: Brown the potatoes in the oil and scramble the eggs until fully cooked. Refrigerate the filling promptly in a shallow container. Once cold, assemble with the cheese, wrap, and keep chilled.
At camp: Place the burritos in a lightly greased covered skillet over low heat. Turn frequently and allow roughly 20–30 minutes from chilled, checking that the centers reach 165°F.
If the tortillas brown before the middle heats, open them and warm the filling directly in the skillet, then reassemble. Serve salsa separately to keep the tortillas from becoming soggy.
2. Apple, Cinnamon, and Peanut Butter Oatmeal
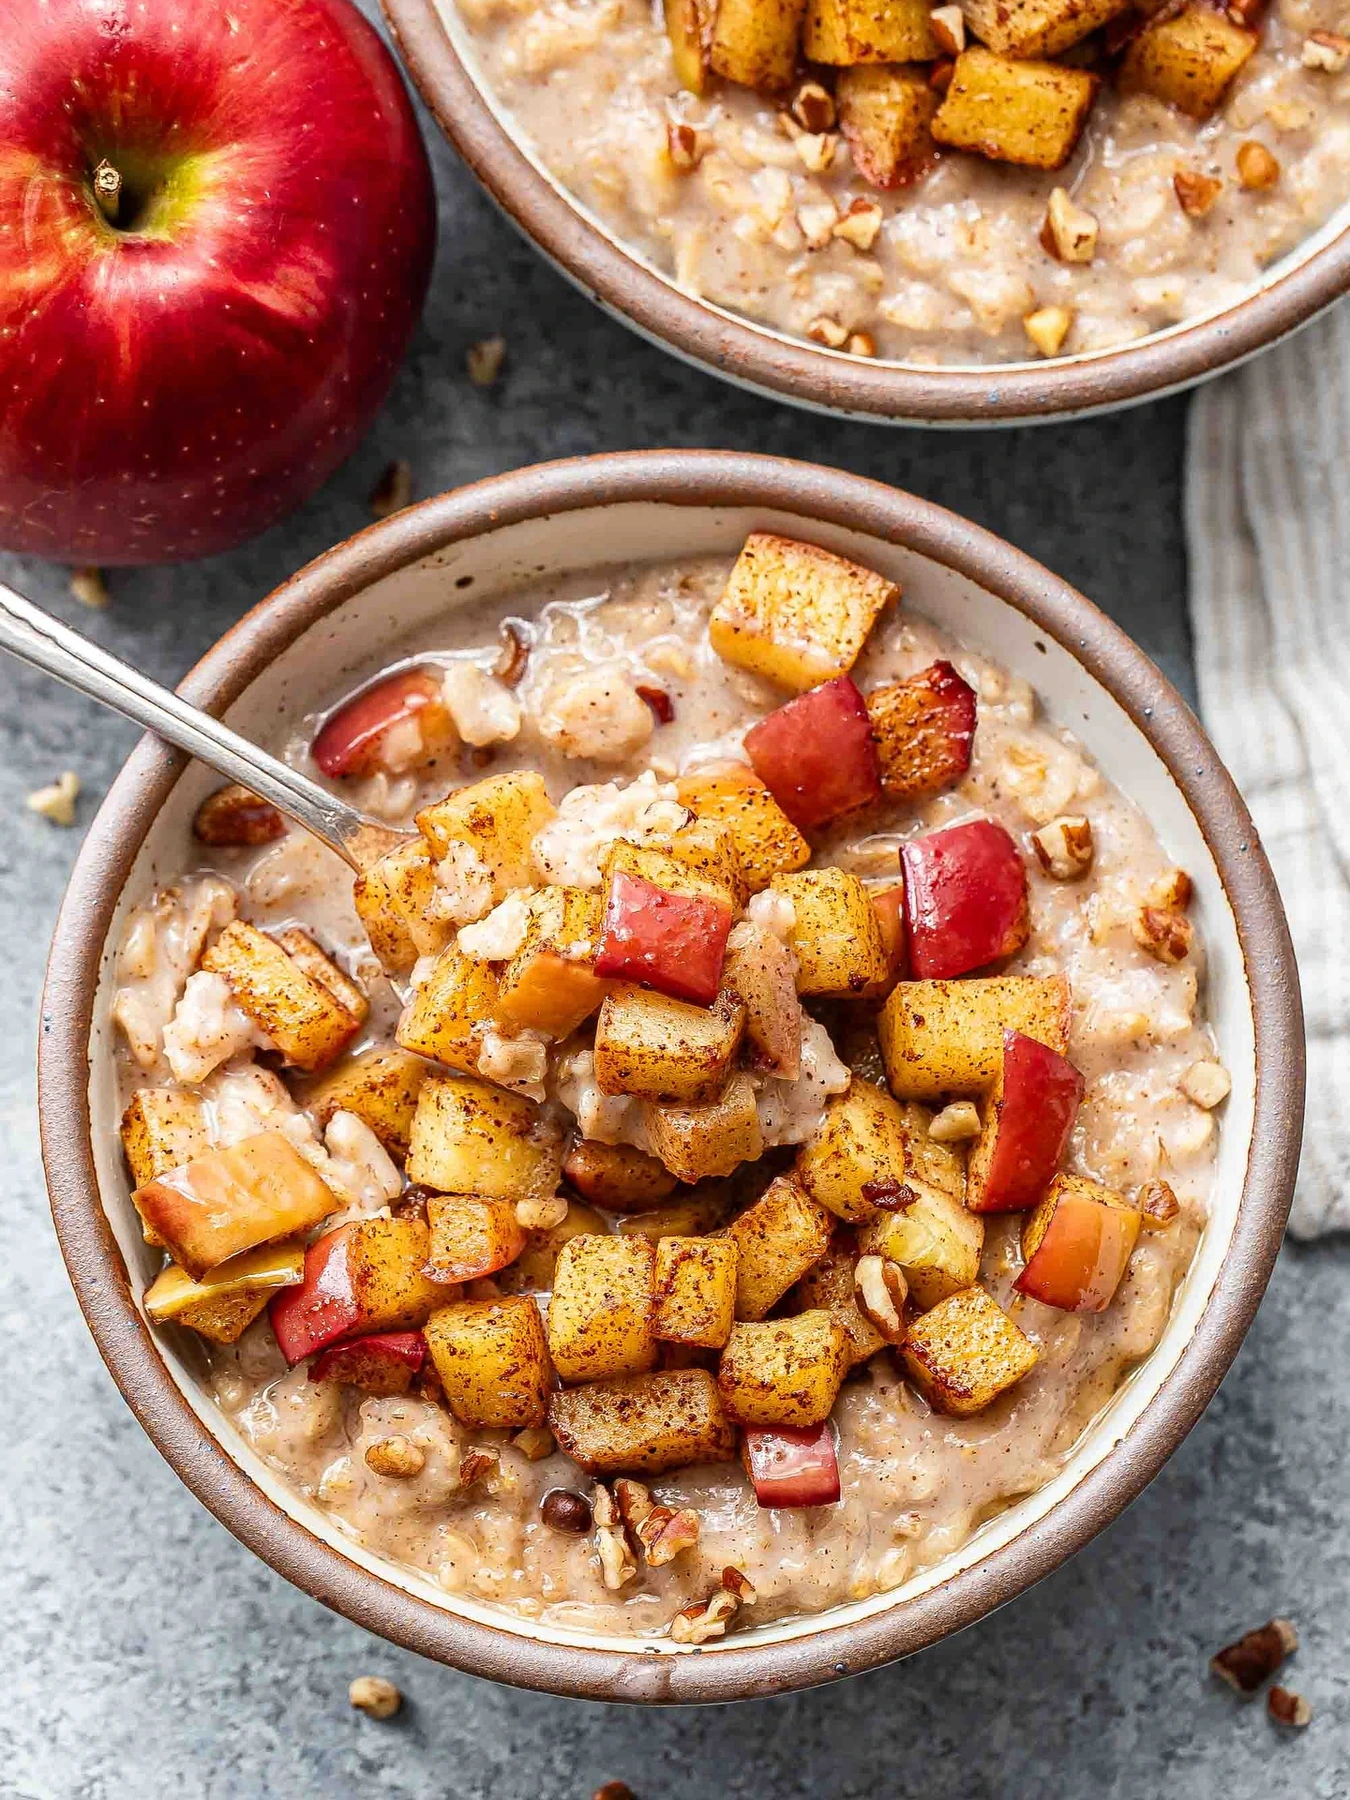
A dry oatmeal kit takes little space and needs only one pot.
Ingredients: 1 cup quick oats, 2 cups water, ¼ cup chopped dried apples, ½ teaspoon cinnamon, 2 tablespoons peanut butter, and a pinch of salt.
Bring the water to a boil. Stir in the oats, dried apples, cinnamon, and salt, then cook according to the oat package instructions. Stir in the peanut butter at the end.
Add a little water if the oatmeal becomes too thick. Measure the dry ingredients into a meal-sized bag at home to avoid campsite measuring.
Dietary swap: Use sunflower seed butter for a suitable nut-free alternative and certified gluten-free oats when needed.
3. Blueberry Pancakes From a Dry Mix
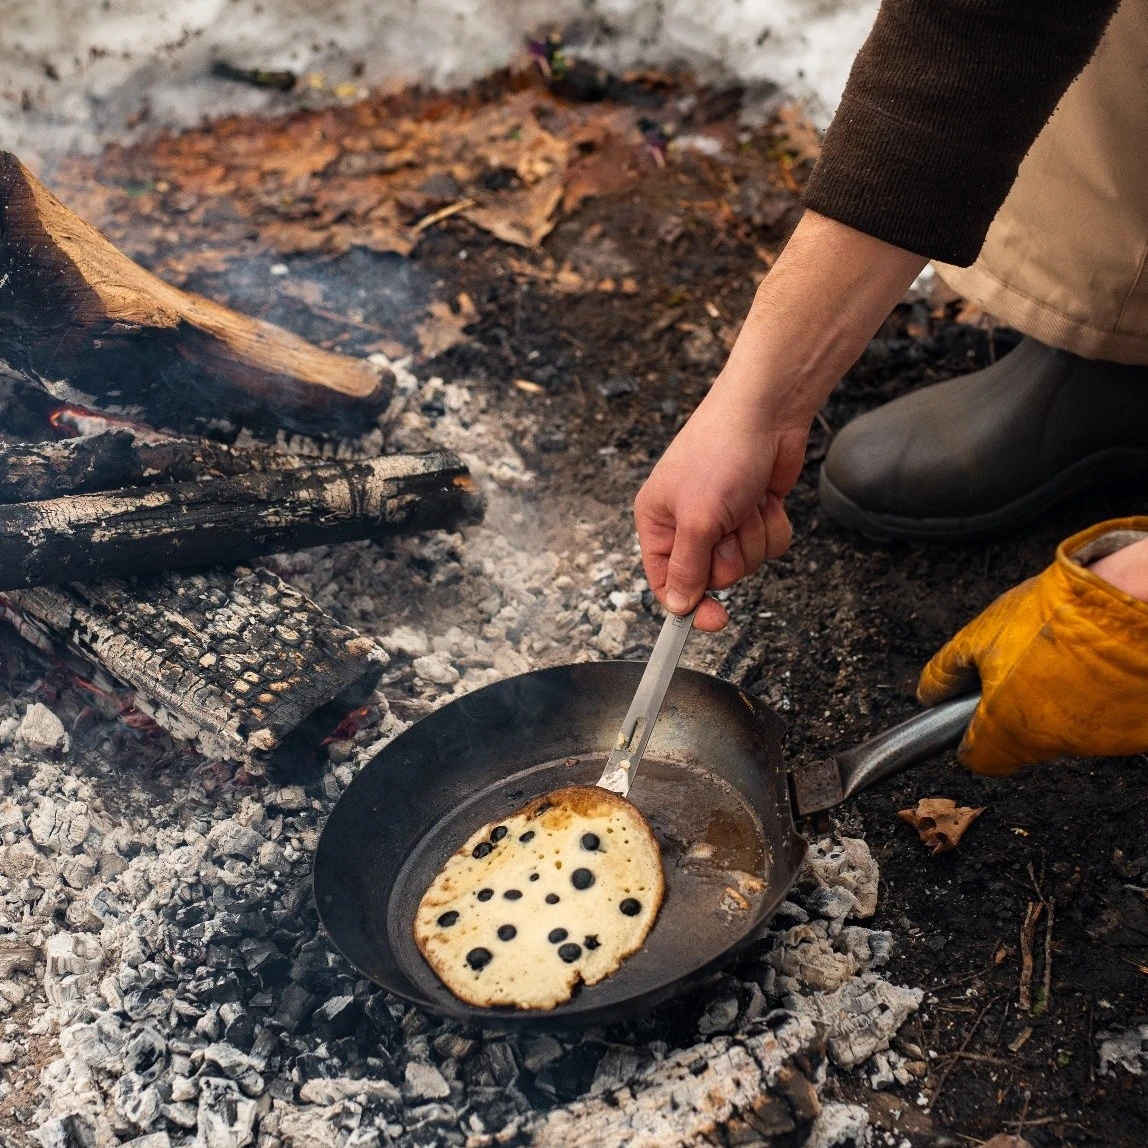
Small pancakes are easier to turn on a camping skillet and cook more evenly than large ones.
Ingredients: 1 cup complete, just-add-water pancake mix, the water specified for that quantity on the package, ½ cup blueberries, and about 2 teaspoons oil.
Mix the batter at camp. Depending on the brand, this should make approximately 6–8 small pancakes; check the package yield when shopping.
Lightly oil the skillet and cook over medium-low heat. Add a few berries to each pancake after pouring the batter. Flip when bubbles appear and the edges begin to set, then cook through.
Use dried blueberries if you have no cooler. If the outside darkens while the center stays wet, reduce the heat and make the next batch smaller.
4. Pepper and Potato Breakfast Hash
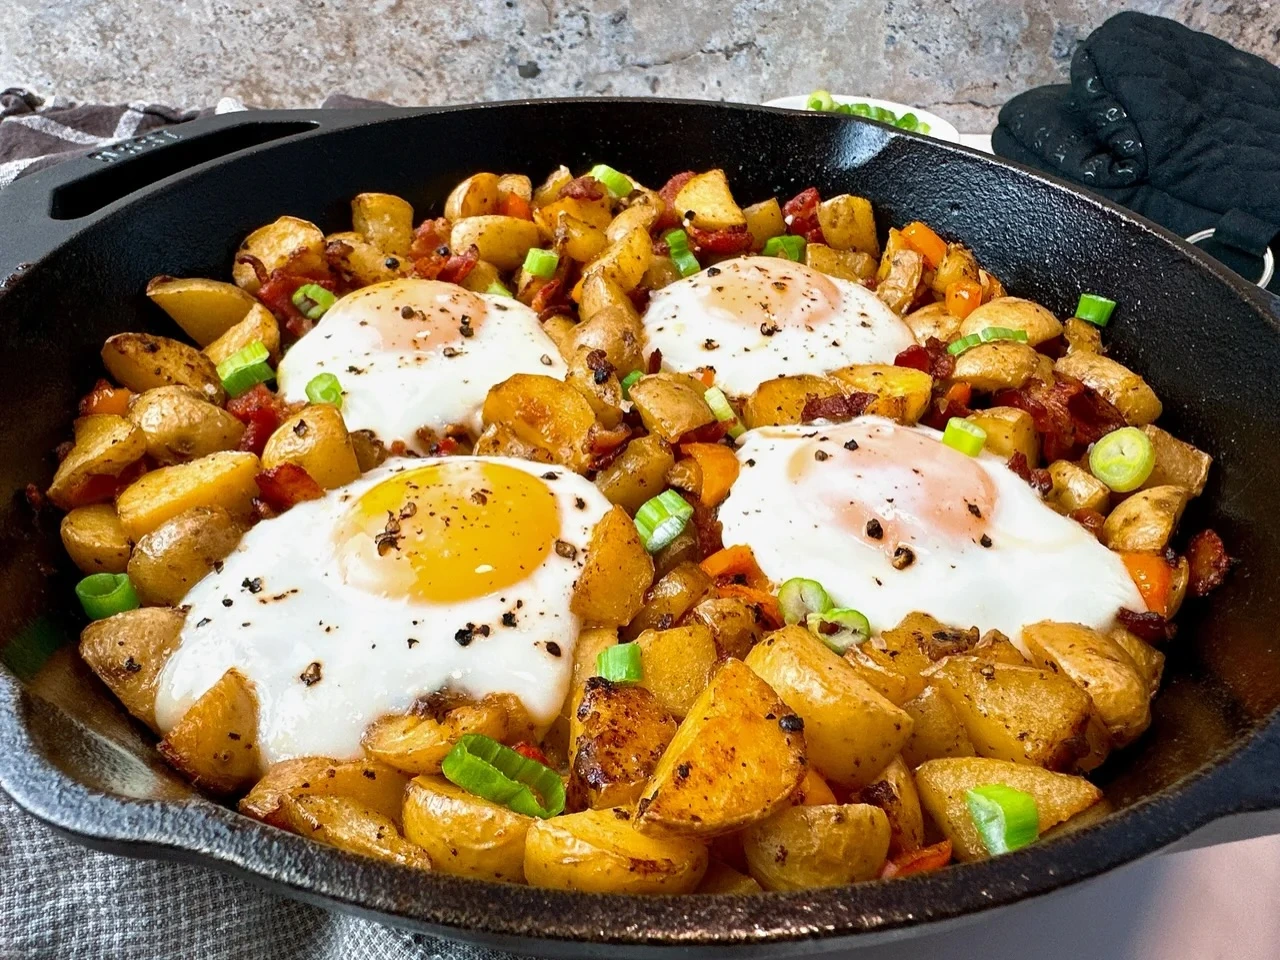
Cooked potatoes shorten preparation and leave more time for browning.
Ingredients: 2 cups cooked diced potatoes, 1 diced bell pepper, ½ diced onion, 1 tablespoon oil, ½ teaspoon smoked paprika, 2 eggs, salt, and pepper.
Cook the pepper and onion in the oil until softened. Add the potatoes and paprika, season, and spread into an even layer. Leave undisturbed for a few minutes between turns to develop browned edges.
Make two spaces for the eggs. Crack them in, cover, and cook until the whites and yolks are firm.
Keep the home-cooked potatoes chilled. For a vegan version, replace the eggs with 1 cup drained canned beans and heat thoroughly.
5. Yogurt, Granola, and Fruit Bowls
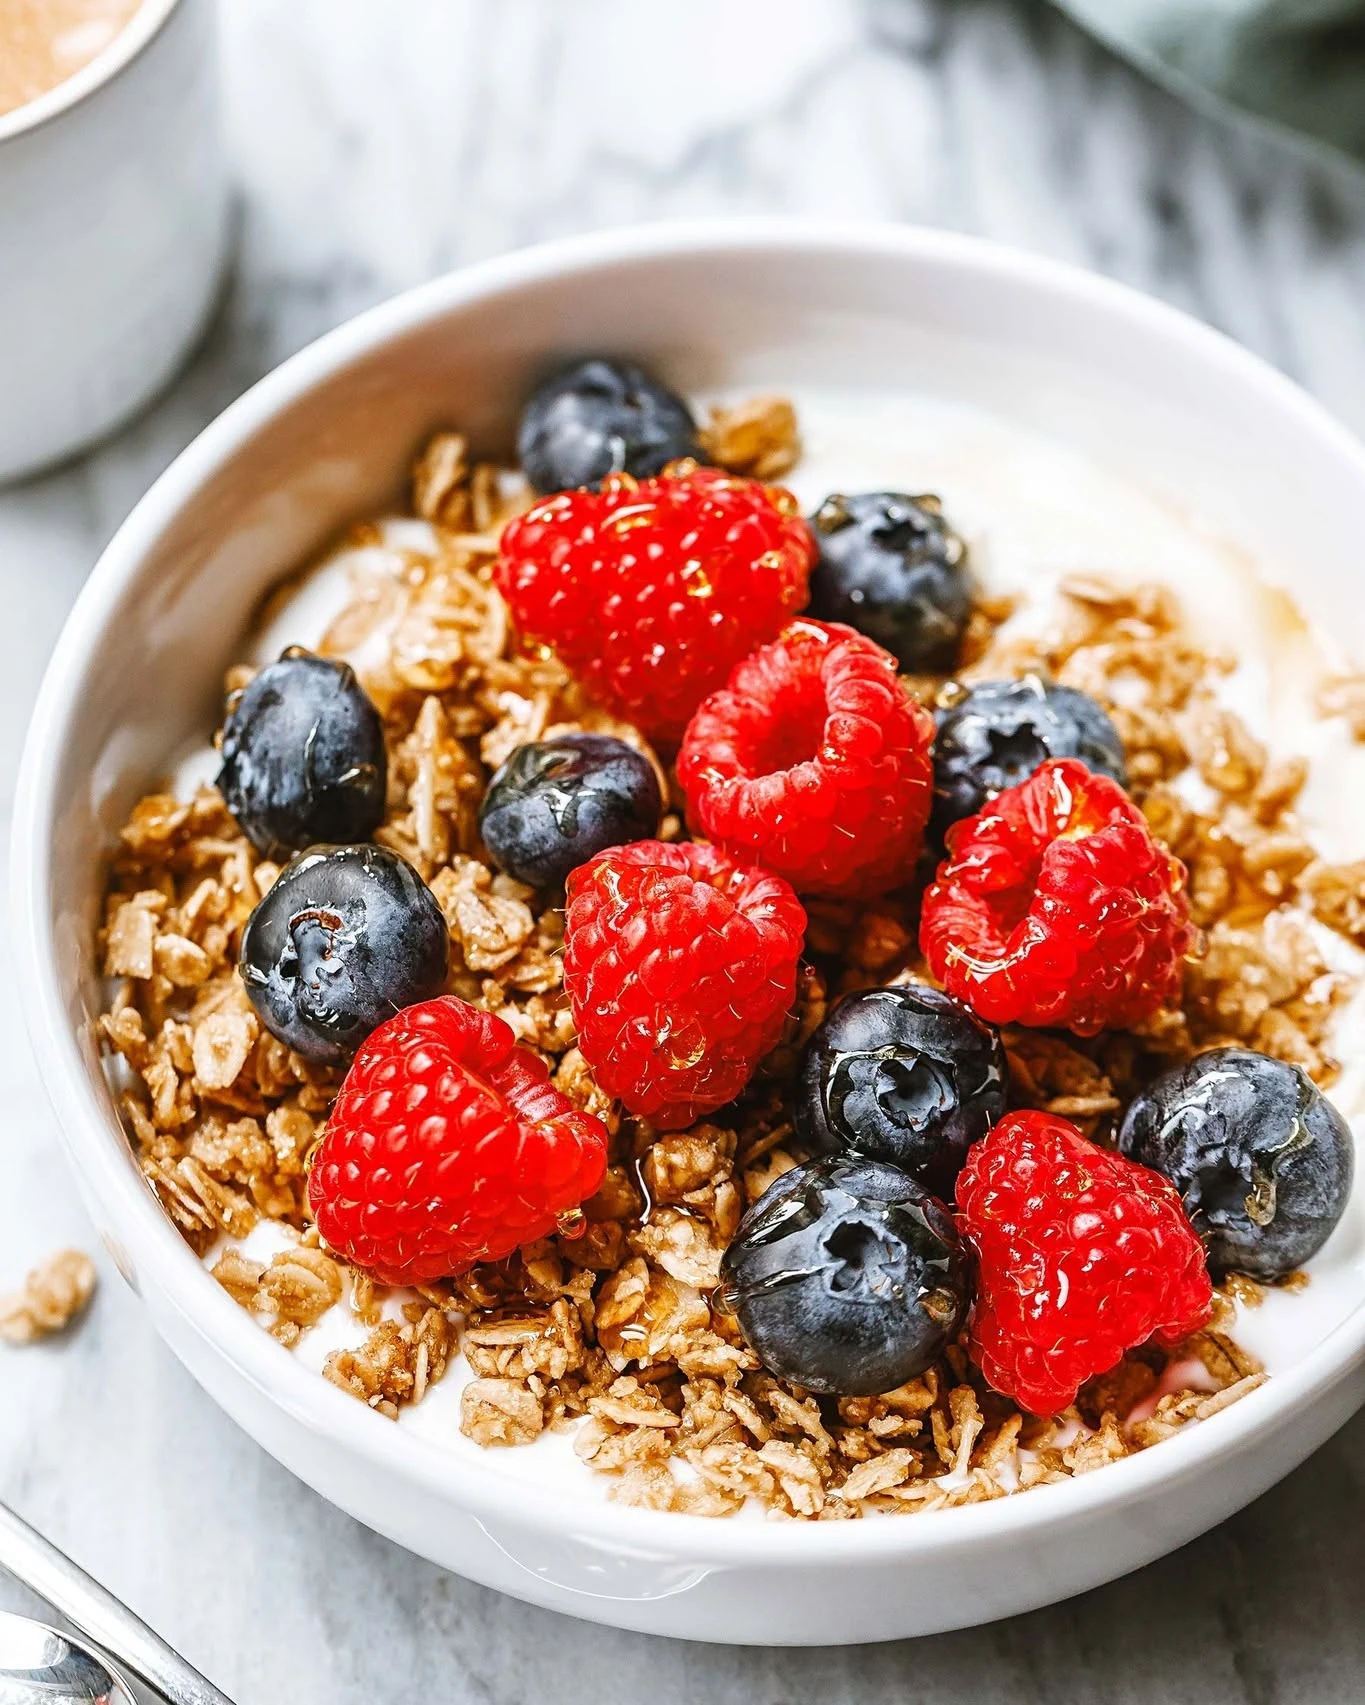
This breakfast keeps the stove available for coffee or another meal.
Ingredients: 1½–2 cups yogurt, ¾ cup granola, and 1 cup berries or sliced fruit.
Divide the yogurt between bowls and add fruit. Sprinkle over the granola immediately before eating so it stays crisp.
Keep the yogurt and prepared fruit chilled. Pack only the quantity you expect to serve rather than bringing a large tub that repeatedly sits out.
A dairy-free yogurt works here if suitable for your needs. Choose gluten-free or nut-free granola when required, checking labels for other allergens.
If peanuts and dairy suit your group, make this peanut butter honey granola at home and pack it separately from the chilled yogurt.
6. Egg and Cheese English Muffins
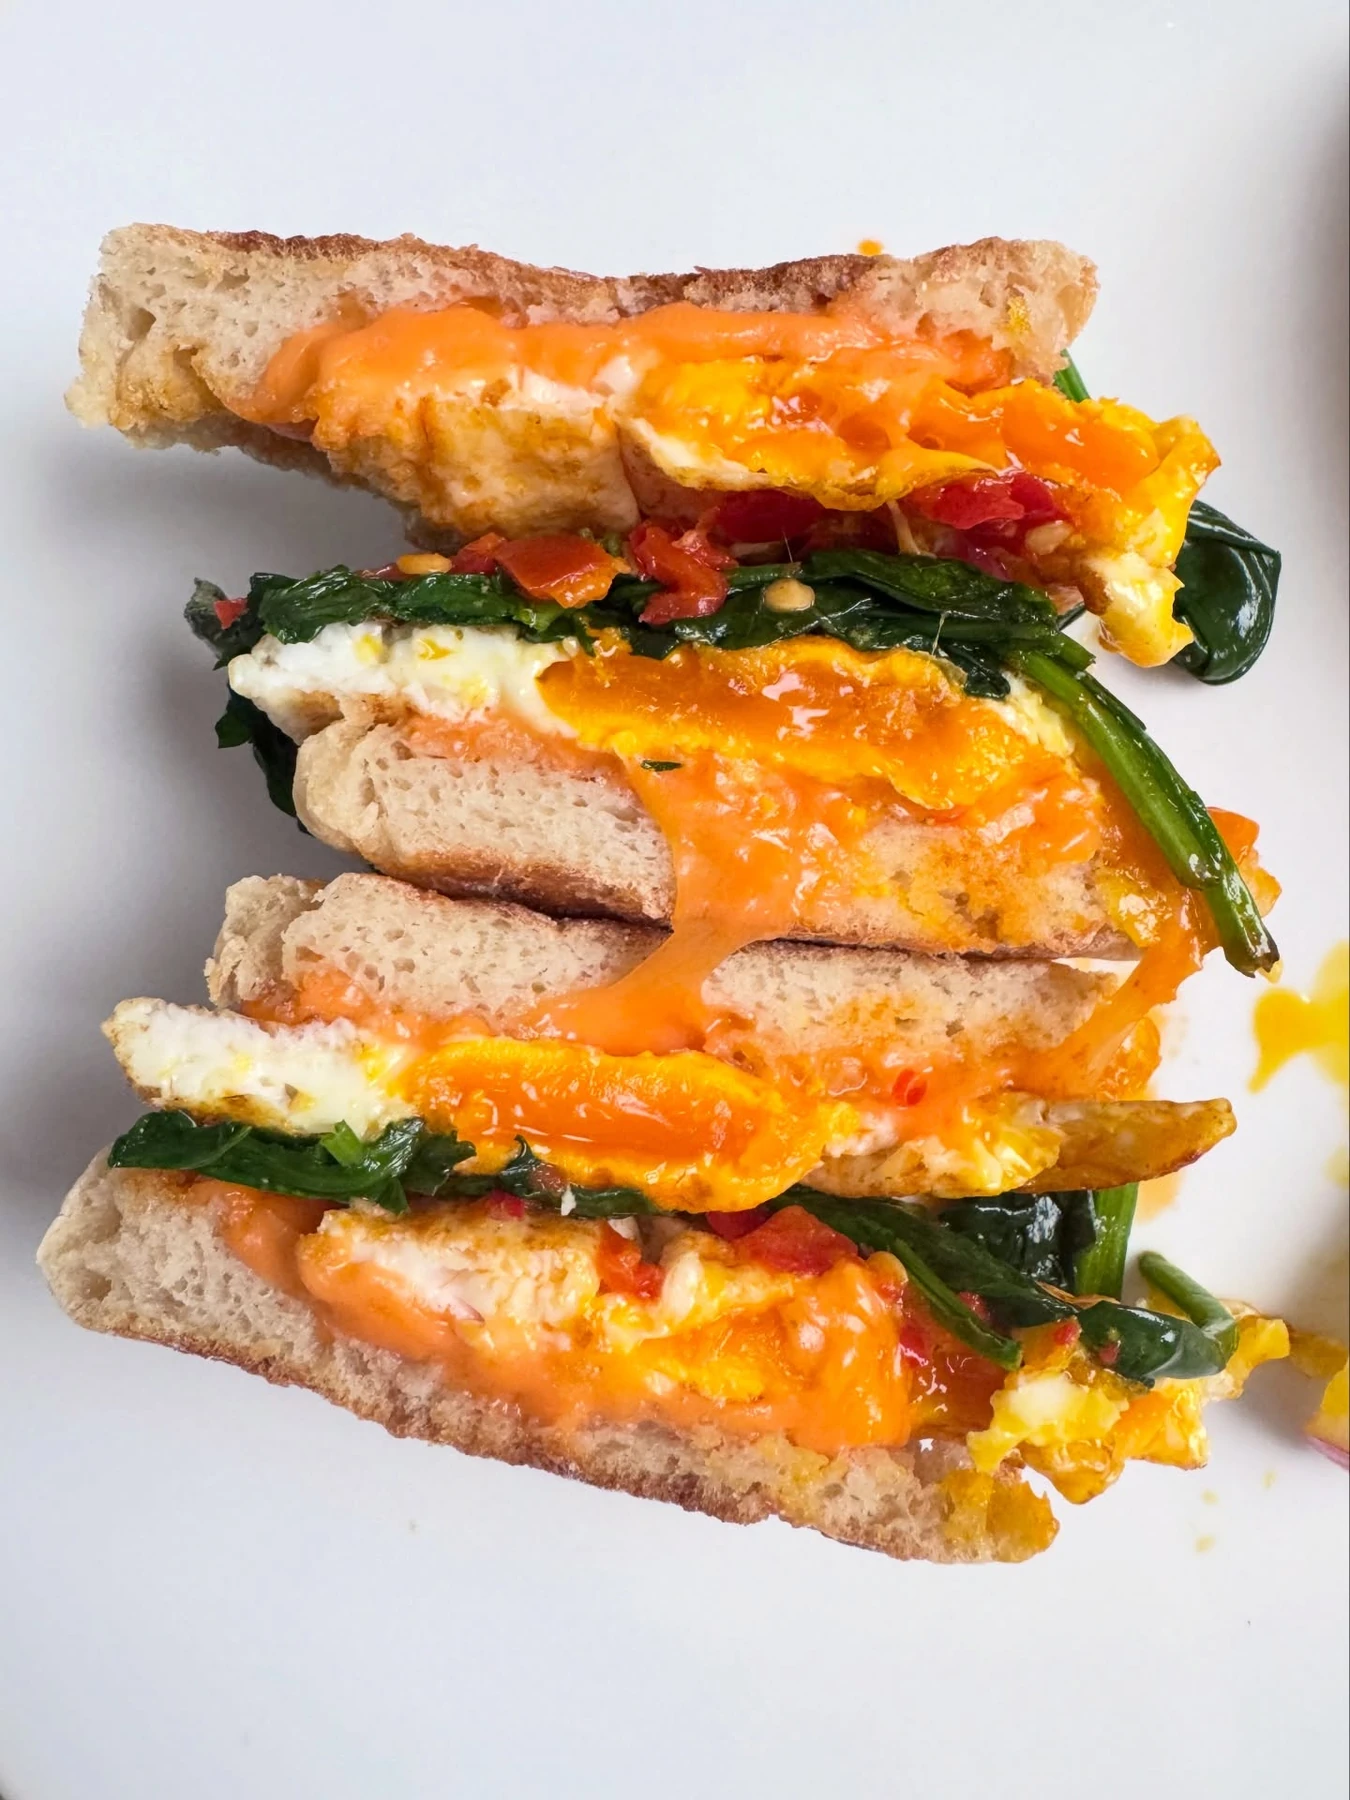
Toast the bread first, then use the same skillet for the eggs.
Ingredients: 2 English muffins, 2 eggs, 2 cheese slices, and 2 teaspoons butter or oil.
Split the muffins and toast them cut-side down in the skillet. Set aside. Add the remaining butter or oil and cook the eggs until the whites and yolks are firm.
Place cheese on the eggs and cover briefly to melt. Transfer to the muffins and serve.
Keep the eggs and cheese chilled. Mustard or hot sauce adds flavor without another cooking step; pack a small portion if you already use it elsewhere on the menu.
Easy Camping Lunch Ideas
7. Crunchy Chickpea Salad Wraps
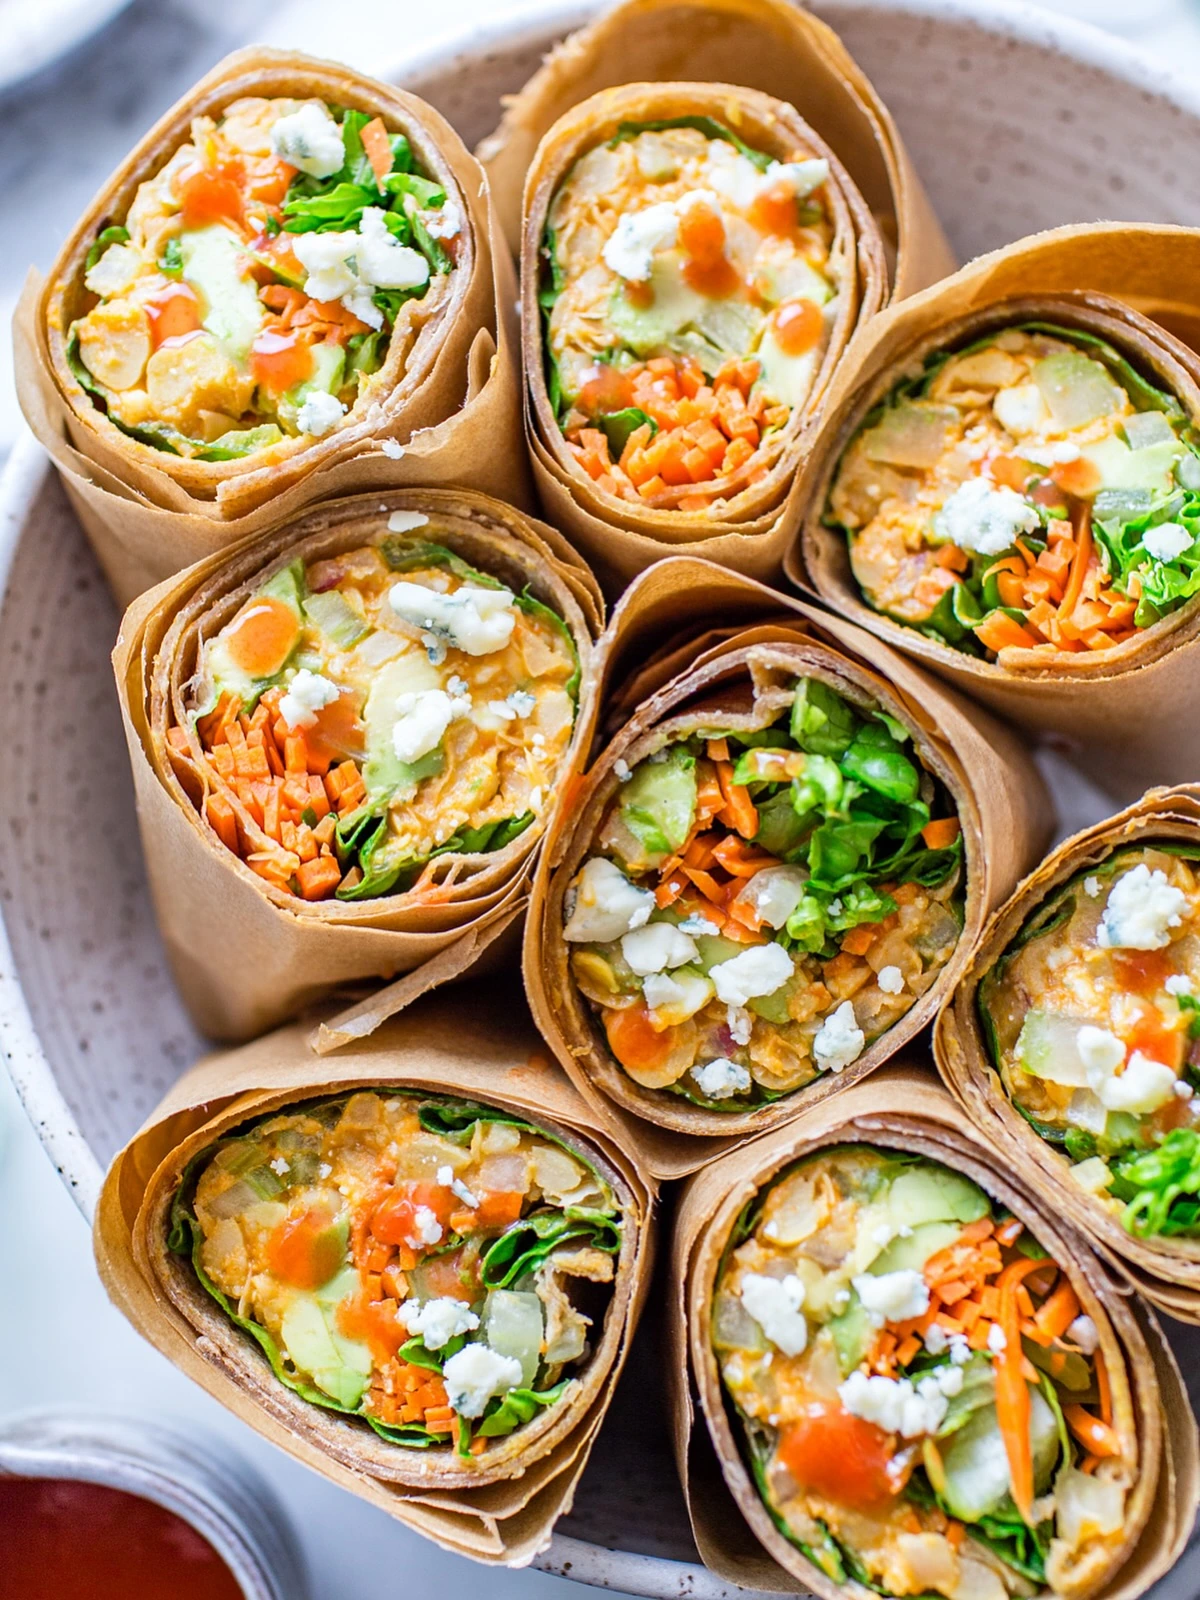
Partly mashed chickpeas make a filling wrap with enough texture to avoid feeling like a smooth spread.
Ingredients: 1 drained 15-ounce can chickpeas, 2 tablespoons tahini, 1 tablespoon lemon juice, 1 finely diced celery stalk, 2 large tortillas, salt, and pepper.
Mash the chickpeas with the tahini and lemon juice. Add drinking water a teaspoon at a time if needed, then fold in the celery and season.
Fill the tortillas shortly before eating. Refrigerate prepared filling and cut celery if storing them.
For a cooler-free version, open the chickpeas at mealtime, omit the celery, and eat the full batch. Tahini contains sesame; use a suitable alternative if needed.
8. Tuna and White Bean Salad
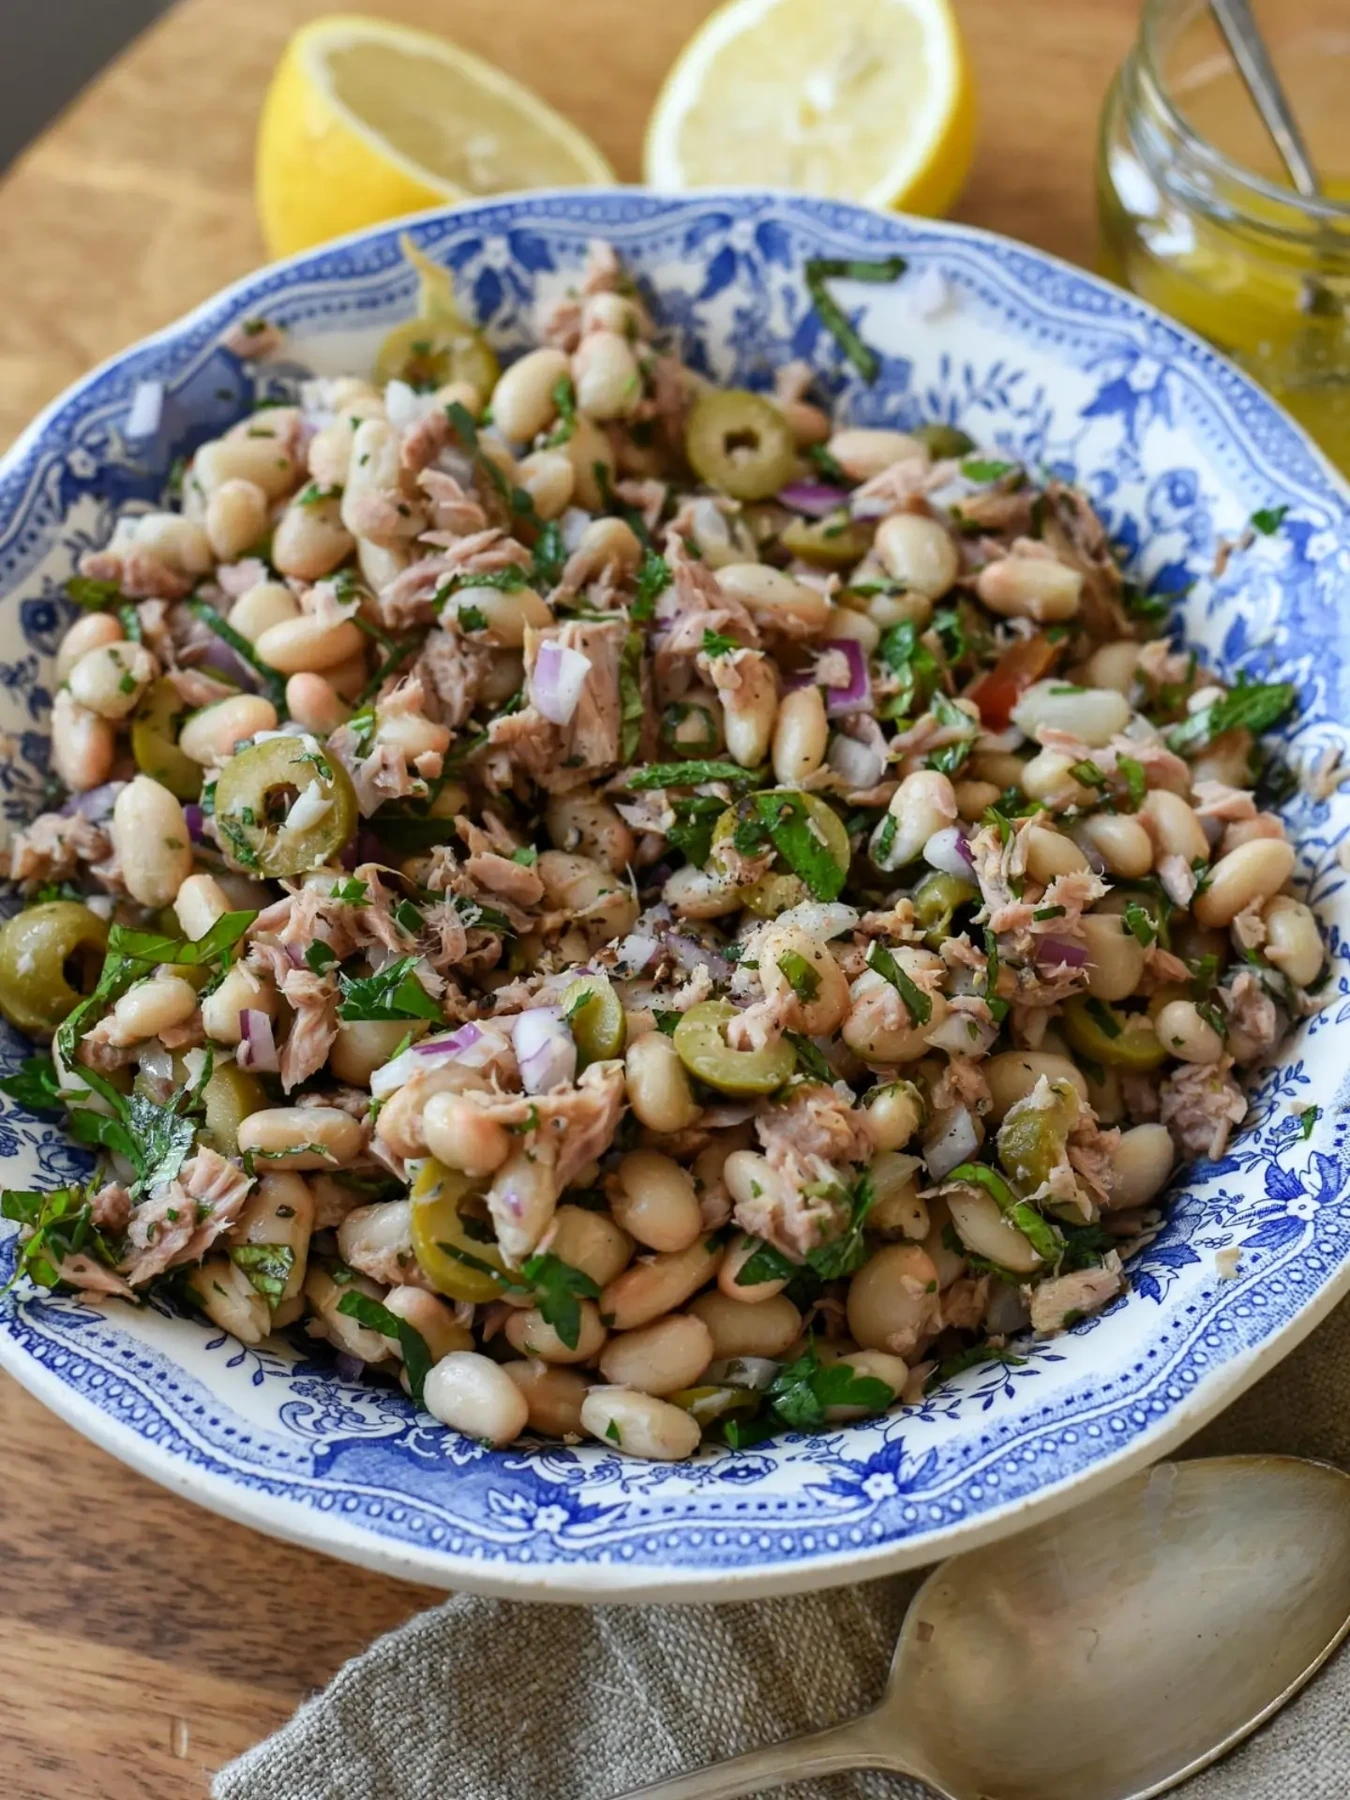
This is a useful savory lunch when you don’t want to cook or use cooler space.
Ingredients: 2 tuna pouches of about 2½–3 ounces each, 1 drained 15-ounce can white beans, 1 tablespoon olive oil, 1–2 tablespoons lemon juice, black pepper, and crackers for serving.
Combine gently, keeping some beans intact. Add sliced olives if you have them.
Open shelf-stable pouches and cans immediately before preparing the salad. Eat promptly or refrigerate leftovers.
For a vegetarian version, replace the tuna with another small can of beans. Use gluten-free crackers if required.
9. Hummus and Vegetable Pitas
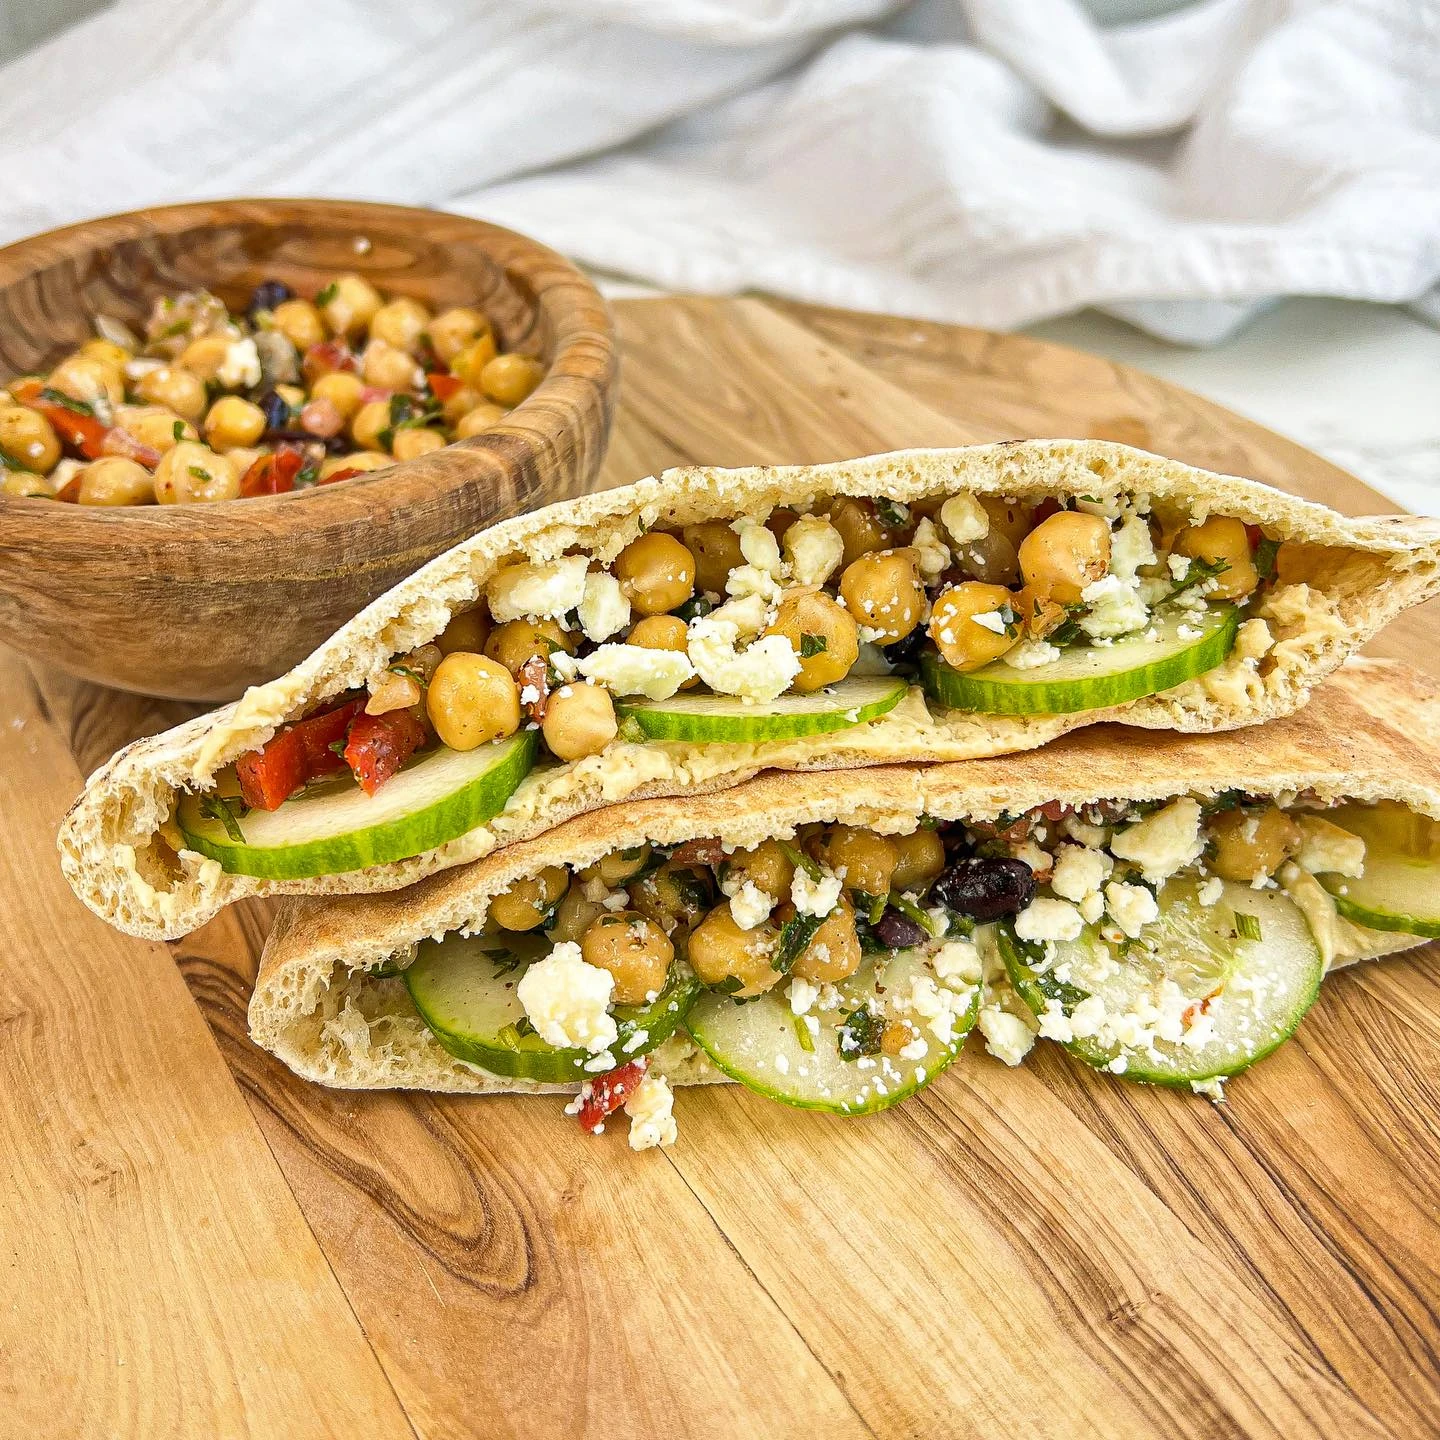
Cabbage and carrots give these pitas a satisfying crunch.
Ingredients: 2 large pitas, ¾ cup hummus, 1 cup shredded cabbage, ½ cup carrot sticks, and ½ sliced bell pepper.
Spread the hummus inside the pitas and add the vegetables just before serving. Dry washed vegetables well so excess moisture doesn’t soak into the bread.
Keep refrigerated hummus and cut vegetables chilled. If carrying the pitas away from camp, use an insulated bag with an adequate cold source.
For less mess, pack the hummus and vegetables separately and assemble at lunchtime. Check hummus labels for sesame and other allergens.
10. Peanut Butter Banana Wraps
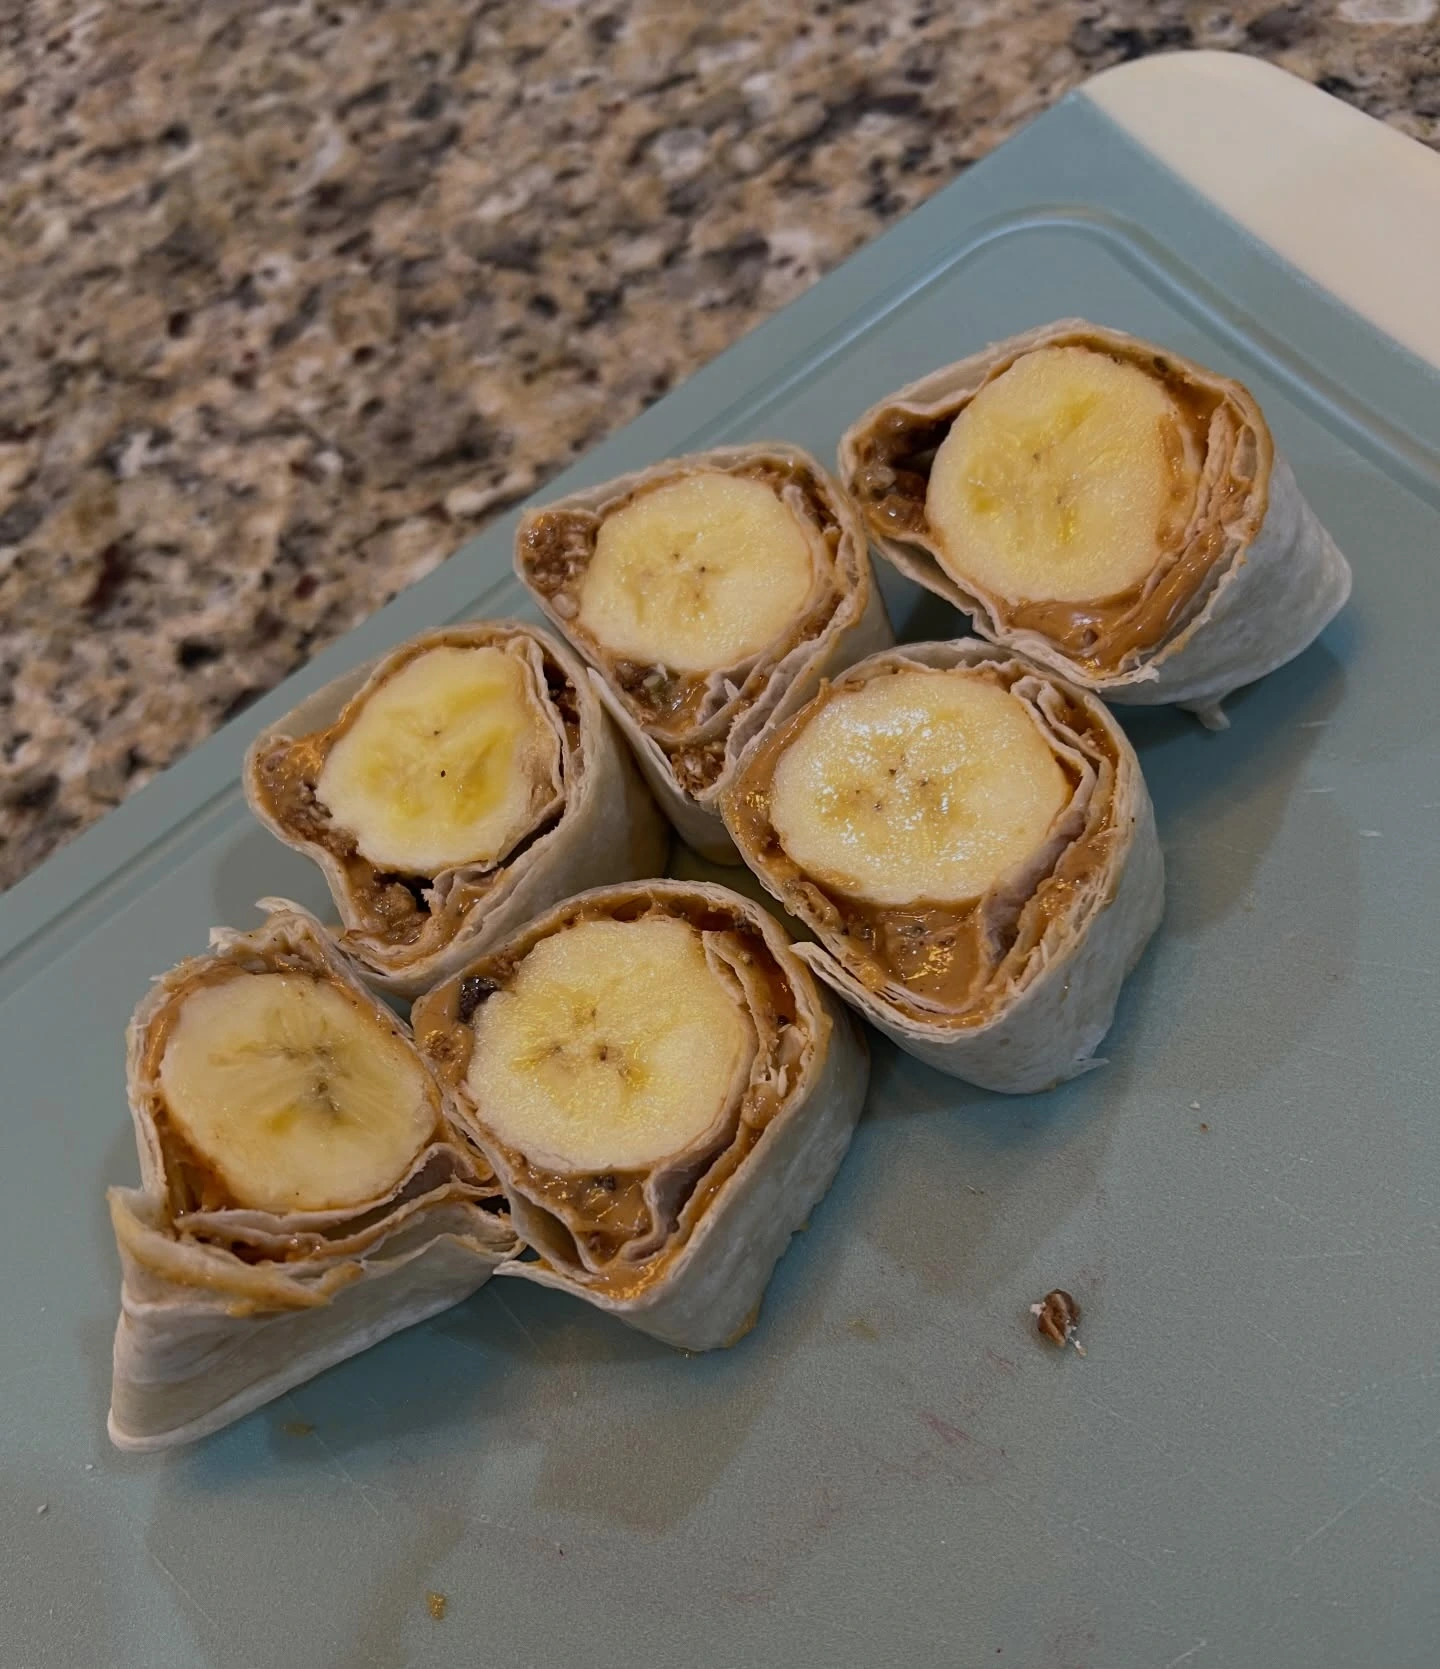
These work as breakfast, lunch, or a backup when your cooking plans change.
Ingredients: 2 tortillas, 4 tablespoons peanut butter, 2 bananas, and a little cinnamon.
Spread each tortilla with 2 tablespoons peanut butter. Add a peeled banana, sprinkle with cinnamon, and roll tightly.
A spoonful of granola adds crunch if you’re eating the wrap immediately. Pack bananas near the top of your food box to prevent bruising.
Use suitable sunflower seed butter for a nut-free version. Gluten-free tortillas can be more fragile, so check their rolling instructions before the trip.
11. Black Bean and Cheese Quesadillas
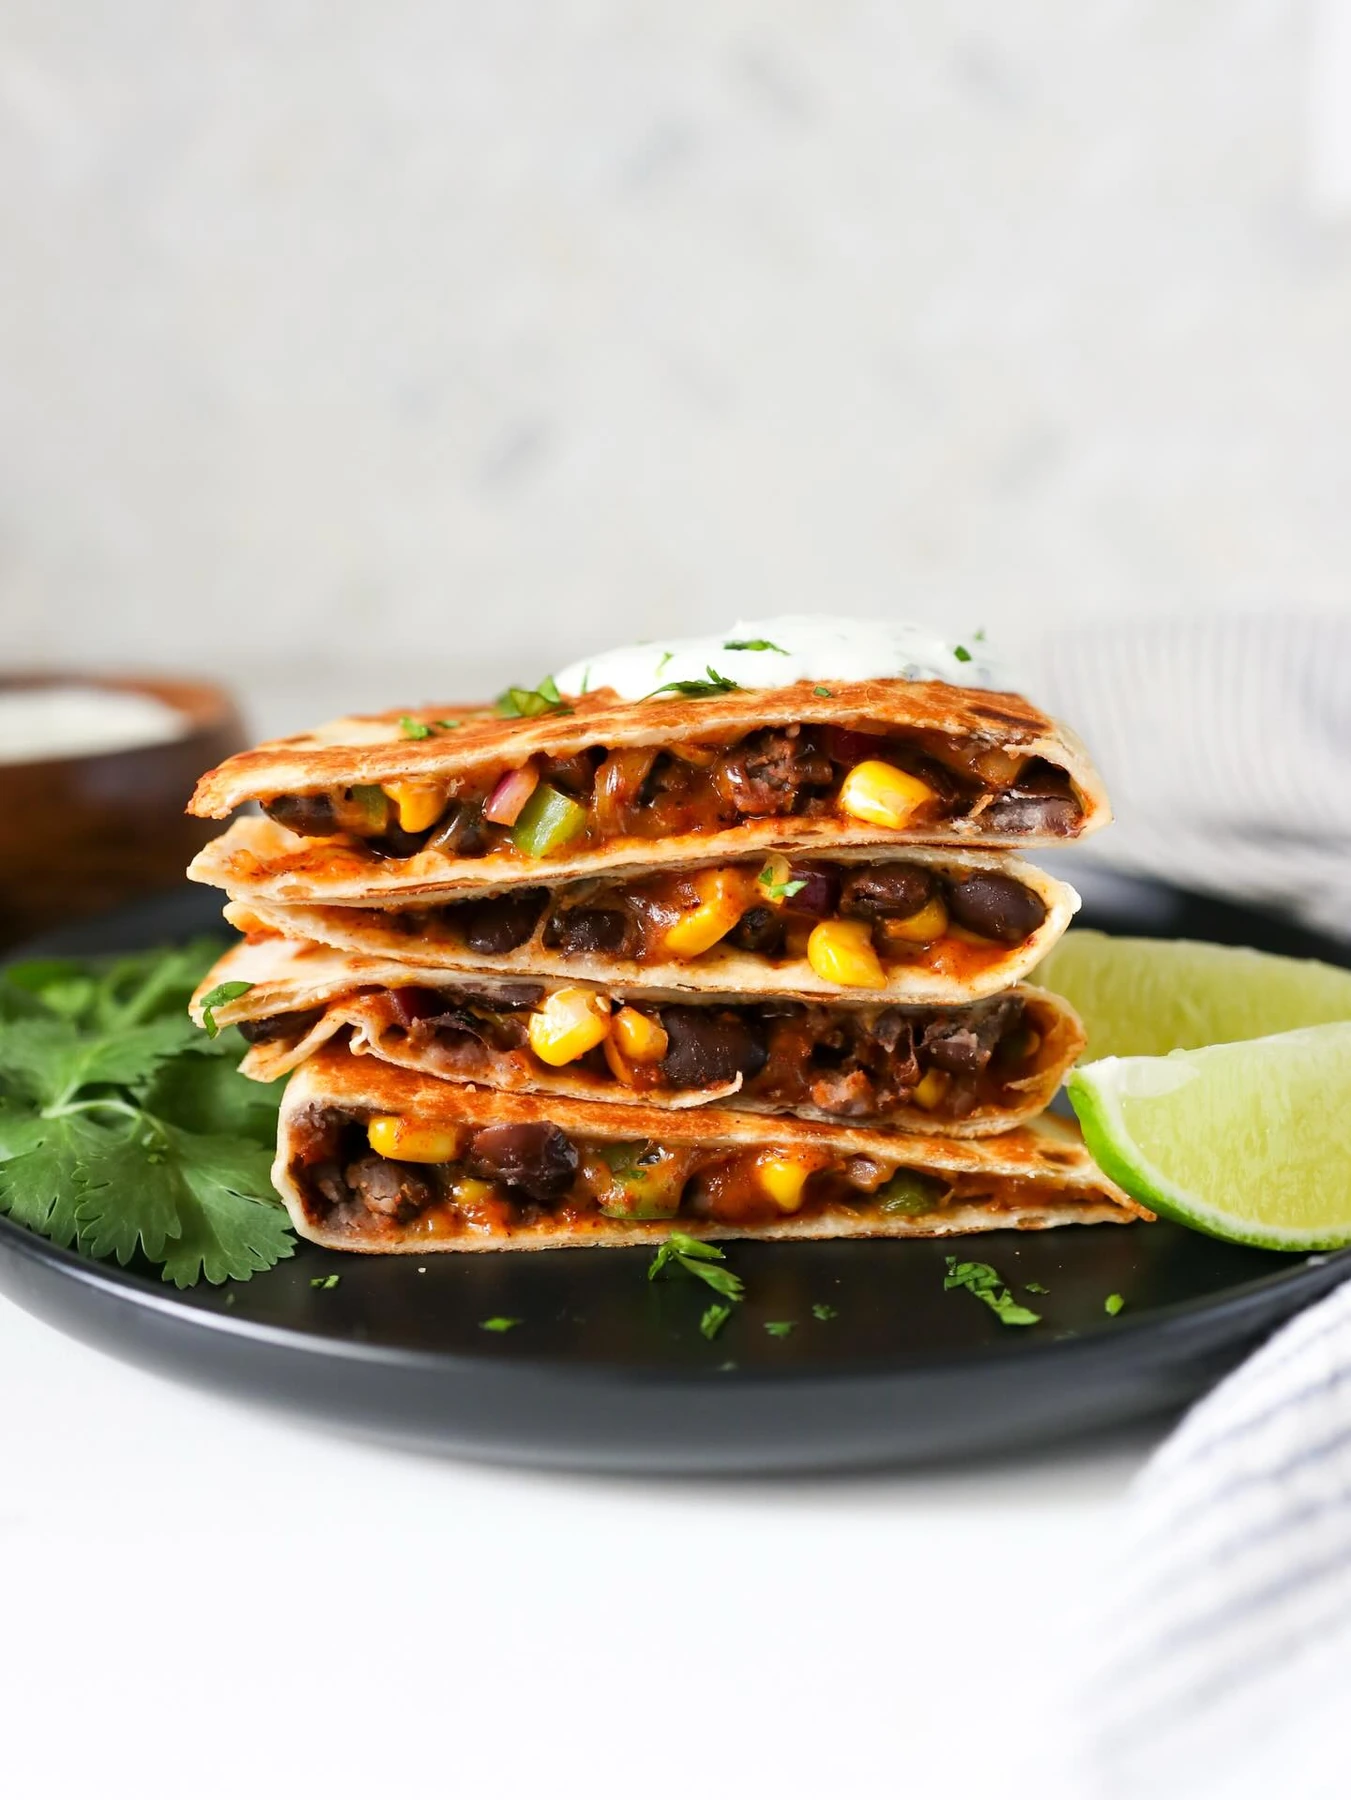
A thin layer of filling warms quickly and makes the tortilla easier to crisp.
Ingredients: 2 large tortillas, ¾ cup drained black beans, ¾ cup shredded cheese, ½ teaspoon cumin, 1 teaspoon oil, and ¼ cup salsa for serving.
Lightly mash the beans with the cumin. Spread over half of each tortilla, add cheese, and fold.
Cook in a lightly oiled skillet over medium-low heat for approximately 3–4 minutes per side, until the filling is hot and the cheese melts. Add salsa after cooking.
If the tortilla browns too quickly, lower the heat and cover briefly. For a dairy-free version, omit the cheese and mash more of the beans to help hold the filling together.
12. Make-Ahead Lemon Pasta Salad
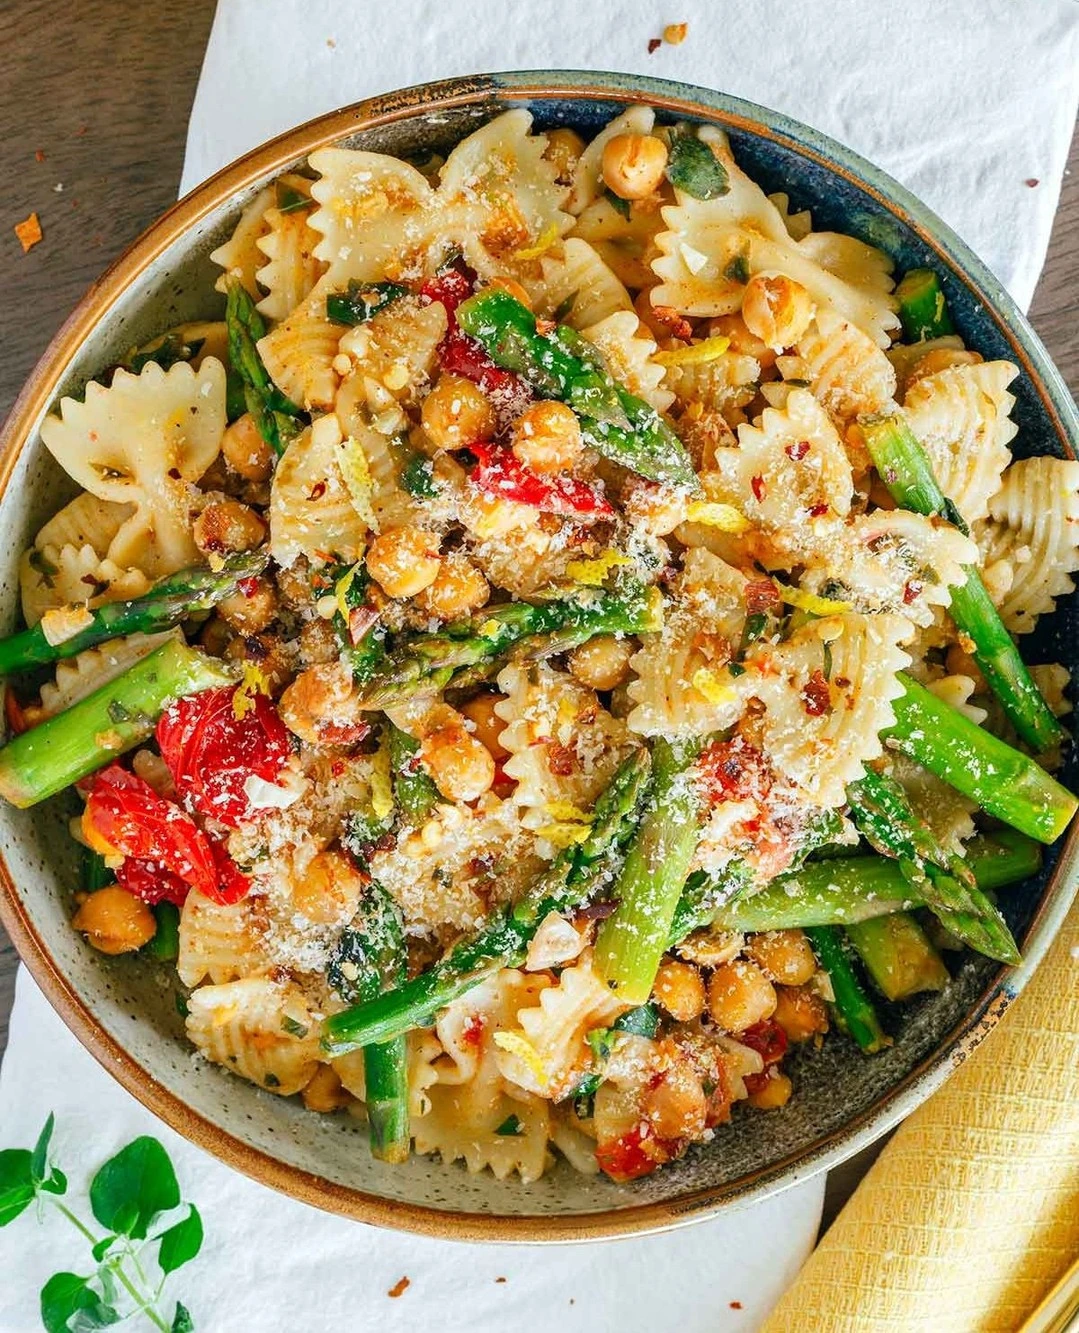
This is a convenient arrival lunch because it’s ready to serve from the cooler.
Ingredients: 6 ounces dry short pasta, 1 drained 15-ounce can chickpeas, ½ cup chopped bell pepper, ¼ cup sliced olives, 2 tablespoons olive oil, 2 tablespoons lemon juice, and ½ teaspoon dried oregano.
Cook the pasta at home. Combine with the remaining ingredients, transfer to a shallow container, and refrigerate promptly.
Stir before serving. If the pasta has absorbed the dressing, add a small splash of oil and lemon juice.
This salad needs refrigeration even though it contains no mayonnaise. Preparing it at home also avoids draining pasta and washing a cooking pot at camp.
Camping Dinner Ideas
13. Sausage, Pepper, and Potato Foil Packets
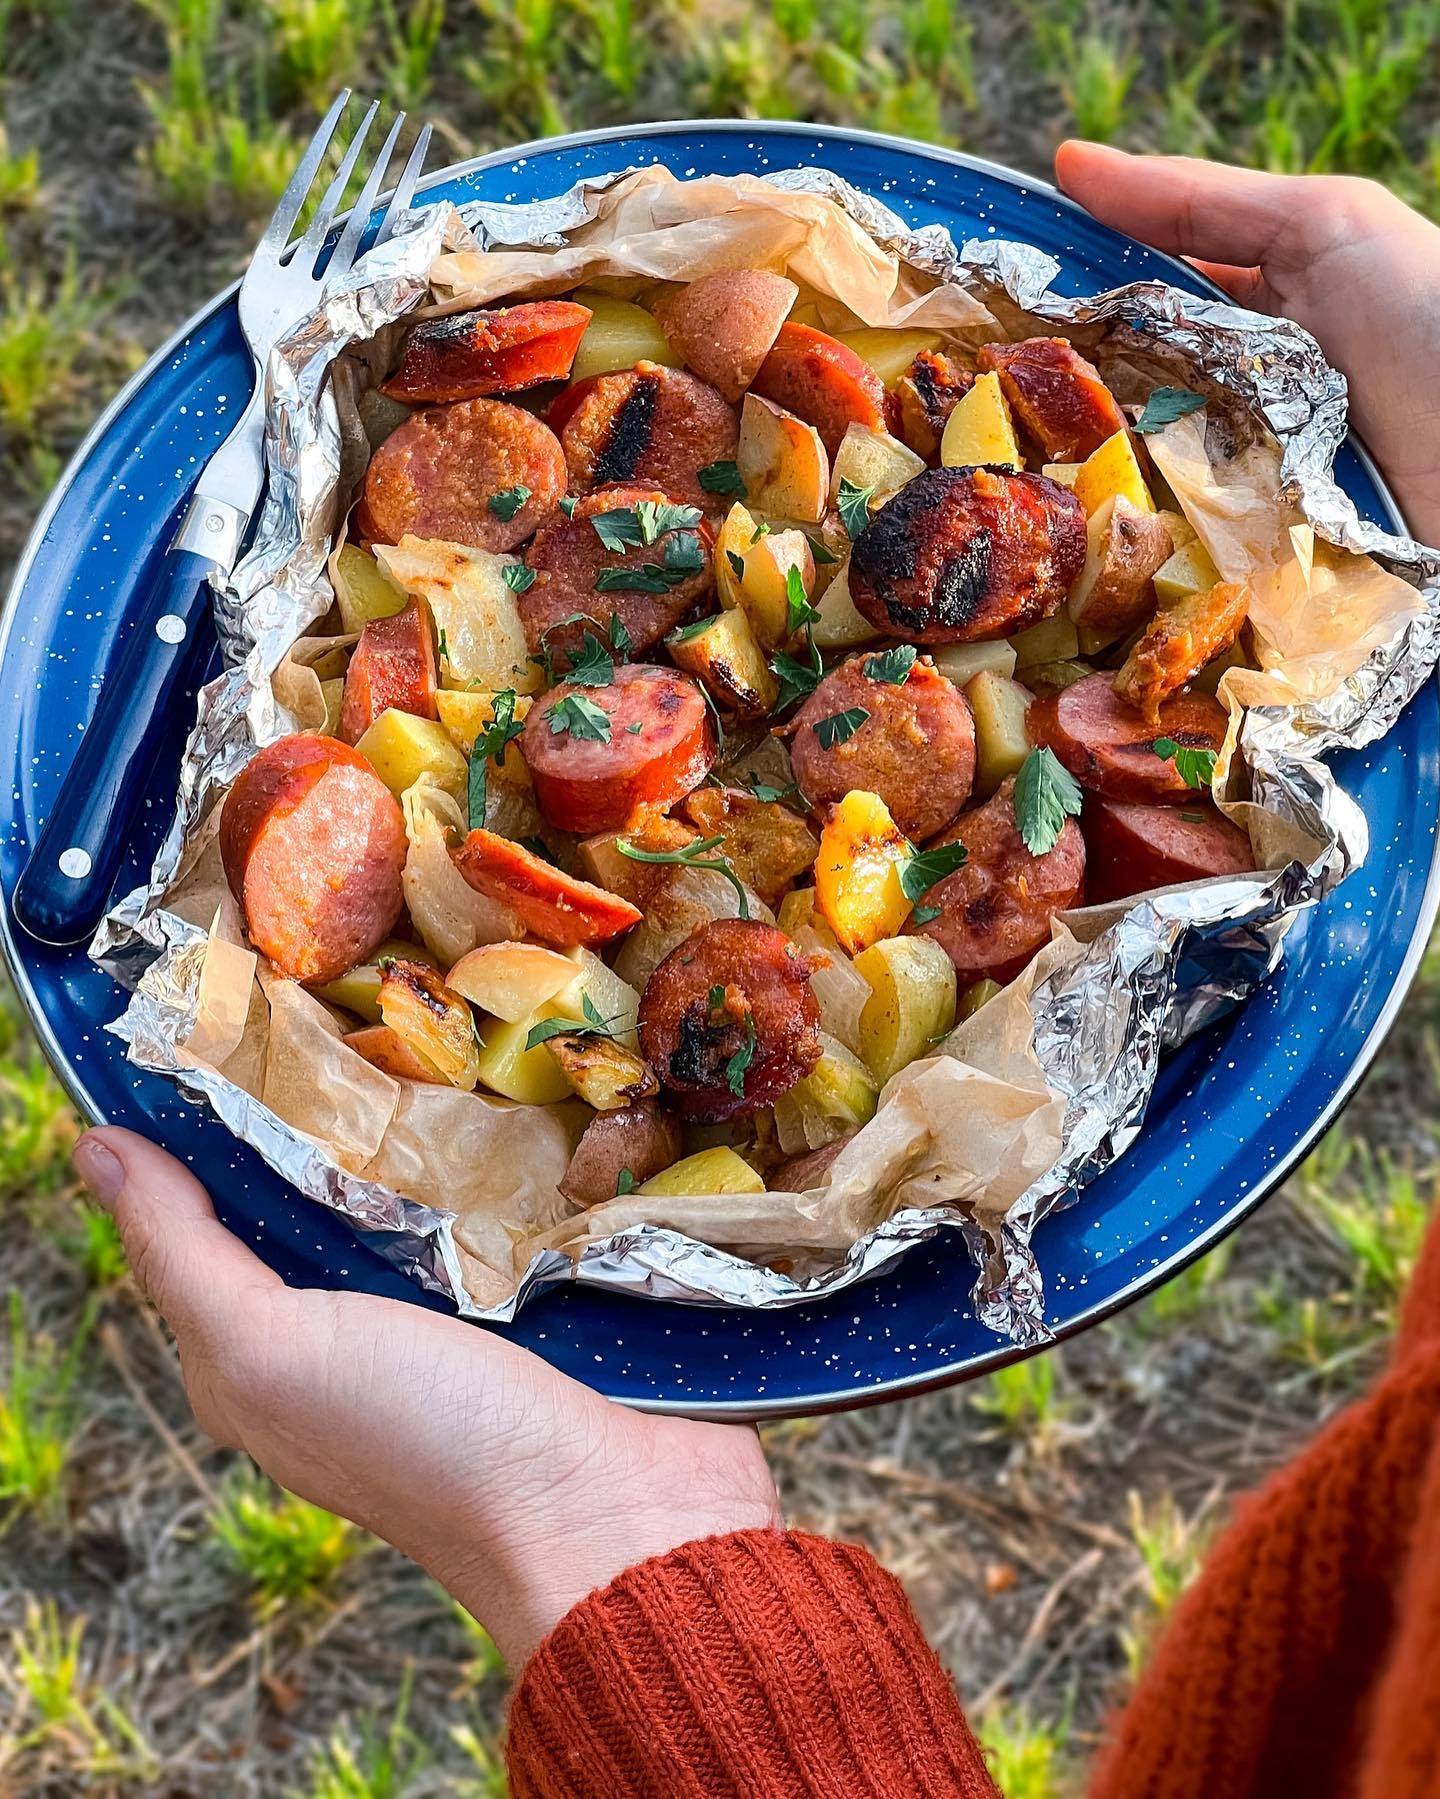
Starting with cooked potatoes helps everything finish together.
Ingredients: 8 ounces sliced fully cooked sausage, 2 cups cooked potato cubes, 1 sliced bell pepper, ½ sliced onion, 1 tablespoon oil, and ½ teaspoon smoked paprika.
Divide between two double-layer sheets of heavy-duty foil. Fold tightly, leaving a little space for steam.
Cook on a grill grate over moderate heat for approximately 20–30 minutes, turning and changing positions as needed. Check that the home-cooked potatoes reach 165°F when reheated.
Keep the packets shallow. Thick bundles heat unevenly. Open carefully, directing steam away from your face.
For a stove version, cook everything in a covered skillet. Replace sausage with drained chickpeas for a vegetarian option.
14. One-Pot Black Bean Chili Mac
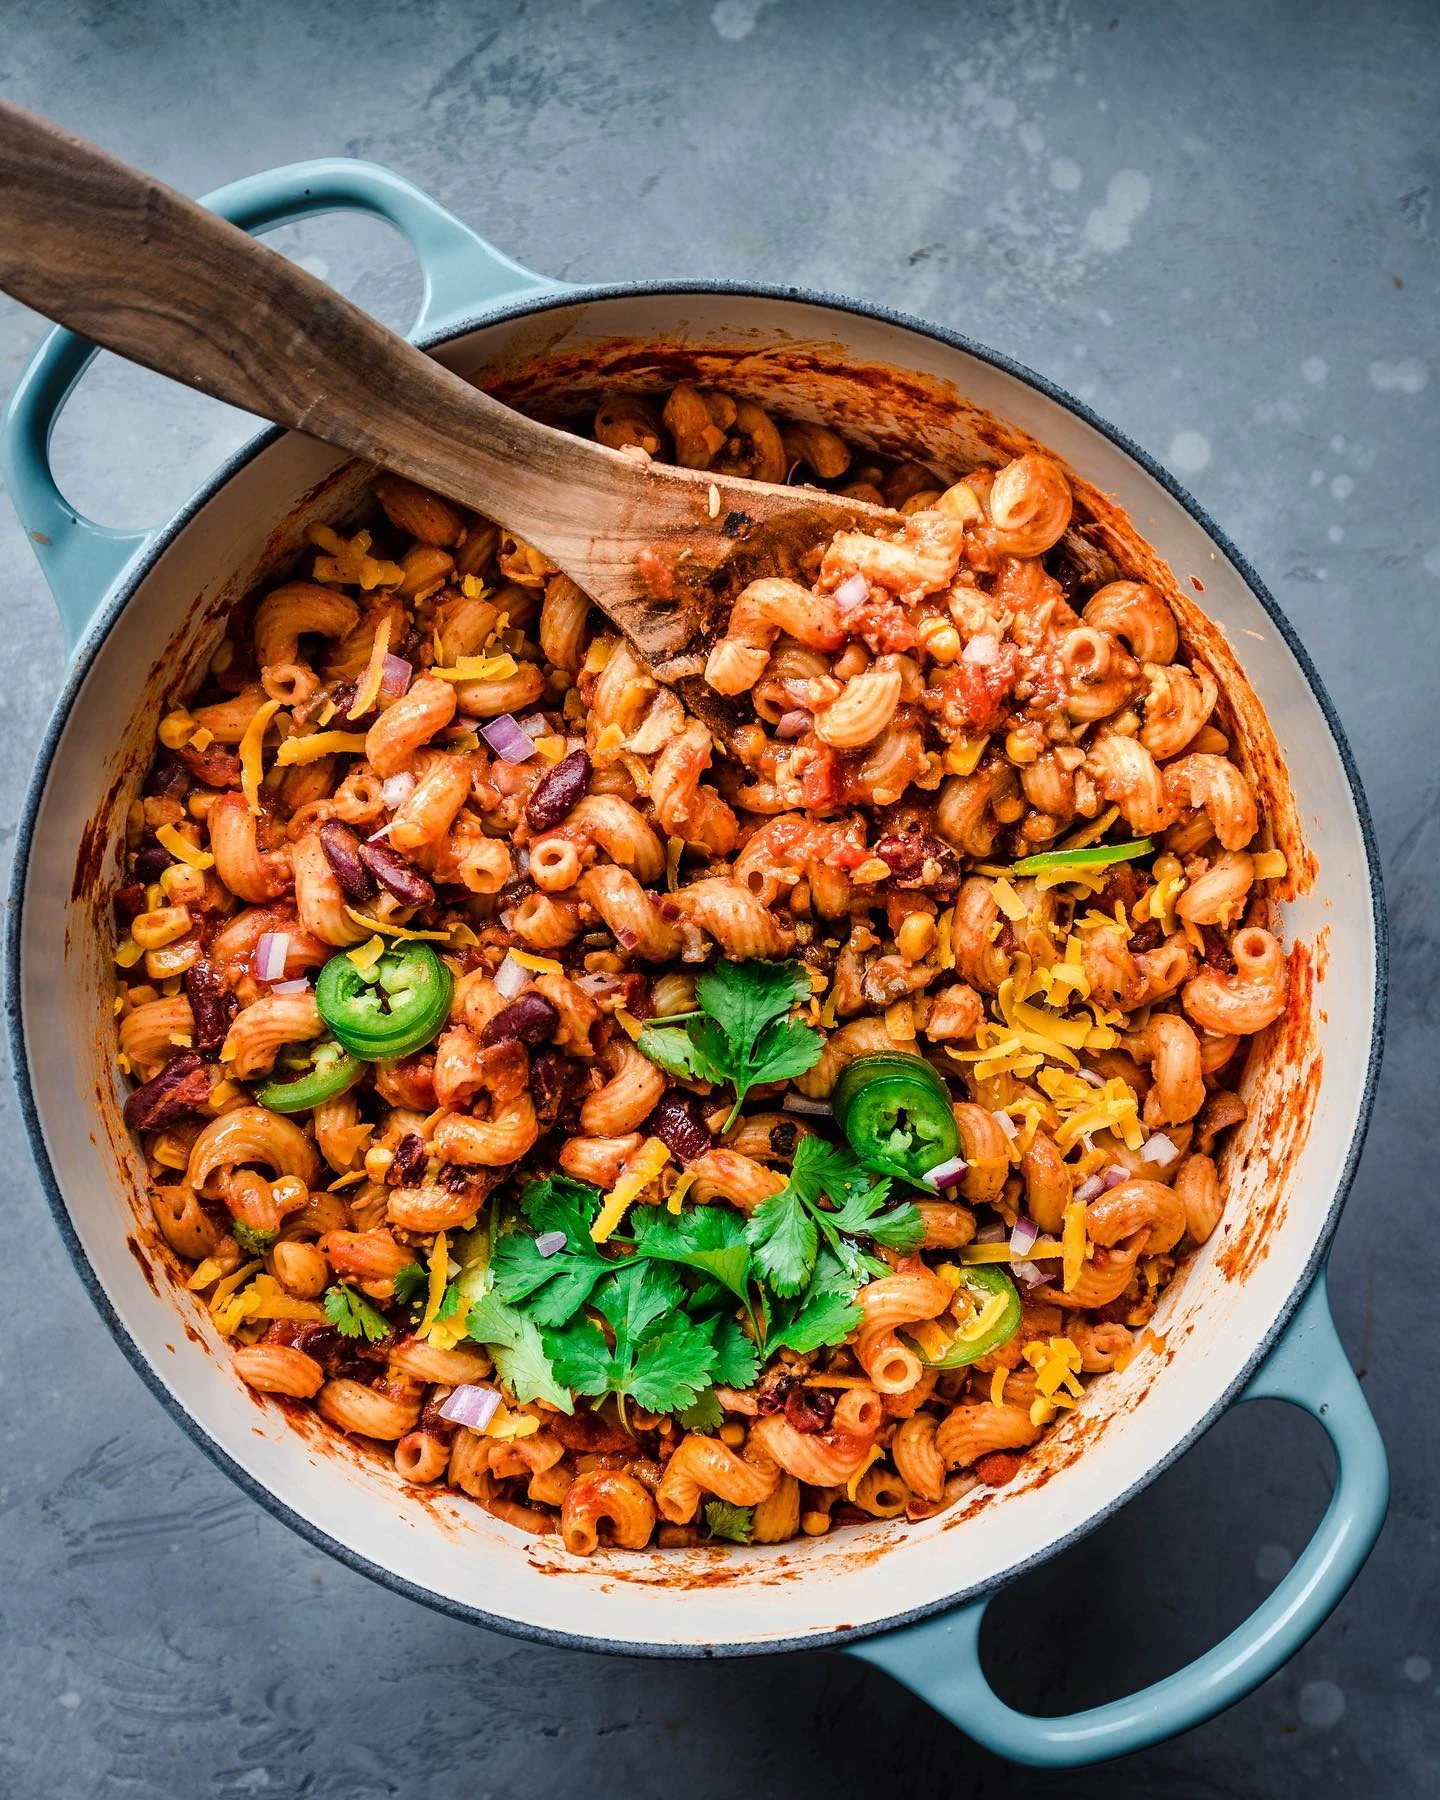
This dinner cooks the pasta in its sauce, saving a separate pot and draining step.
Ingredients: 6 ounces elbow macaroni, 1 drained 15-ounce can black beans, 1 14–15-ounce can diced tomatoes with juice, 1½ cups water to start, 1 teaspoon chili powder, and ½ teaspoon cumin.
Combine in a pot and bring to a gentle simmer. Cover loosely and cook, stirring frequently, until the pasta is tender.
Add water in small amounts if the sauce thickens before the macaroni cooks. The required amount depends on the pasta and evaporation.
Finish with crushed tortilla chips or optional cheese. Without cheese, the unopened ingredients can travel without refrigeration.
15. Coconut Chickpea Curry
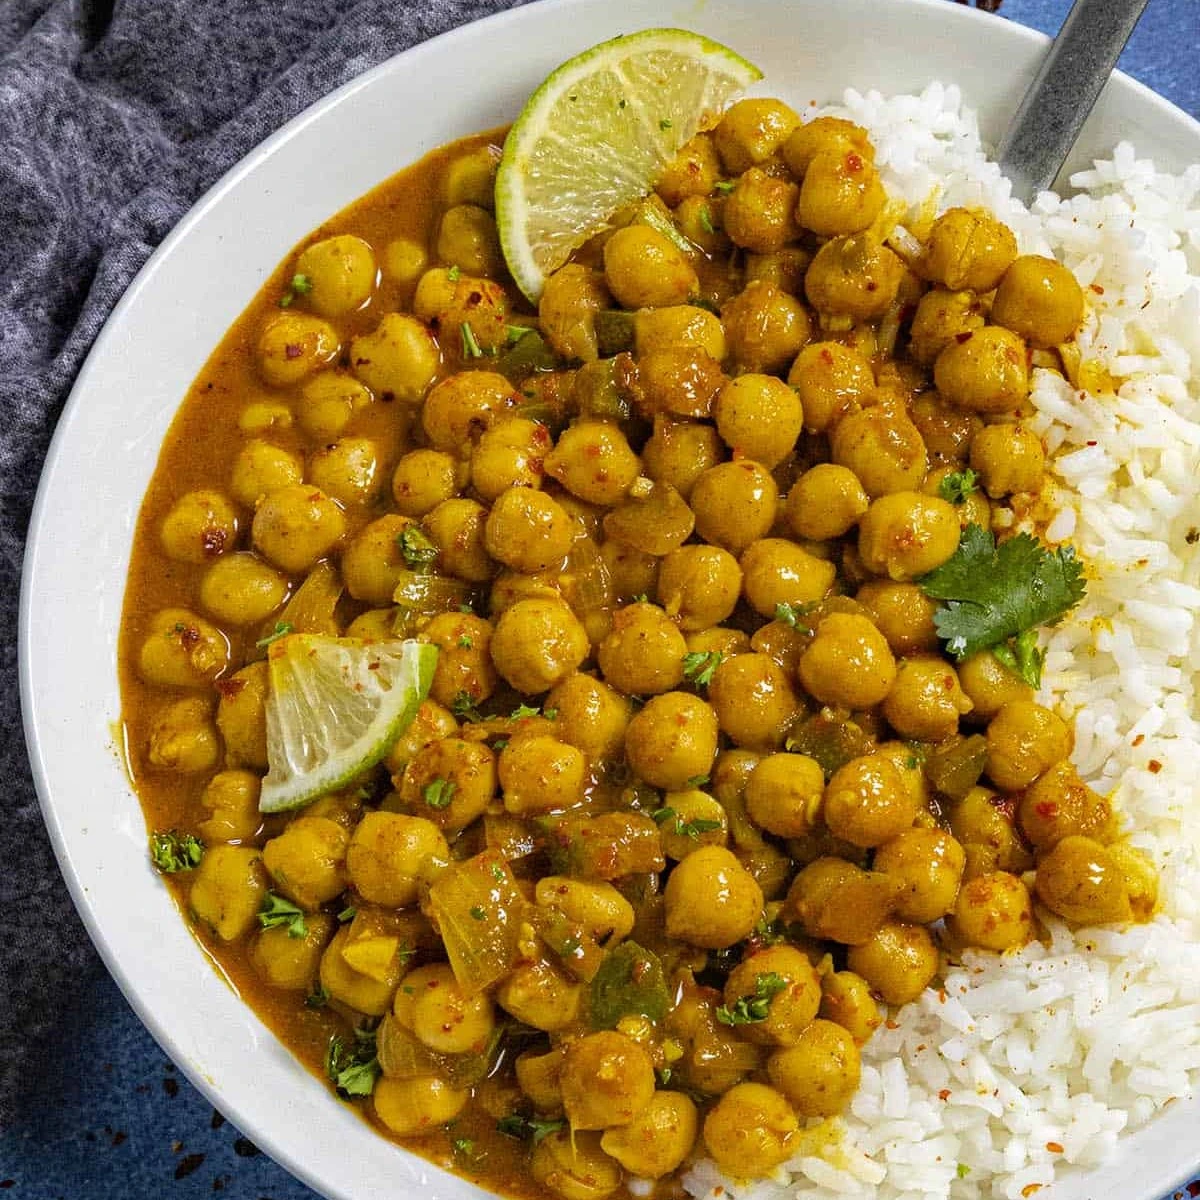
A small can of coconut milk gives this curry a creamy sauce without leaving much to store.
Ingredients: 1 drained 15-ounce can chickpeas, 1 small 5–6-ounce can coconut milk, 1 sliced bell pepper, 1 teaspoon oil, 1–2 teaspoons curry paste, ½ cup water, and 1 cup dry instant rice.
Prepare the rice with the water and method specified on its package.
Meanwhile, soften the pepper in the oil. Stir in the curry paste, then add chickpeas, coconut milk, and ½ cup water. Simmer for 8–10 minutes.
With one burner, cook the rice first and keep covered while preparing the curry. Check the curry paste label: some contain seafood, and heat levels vary considerably.
16. Skillet Flatbread Pizzas
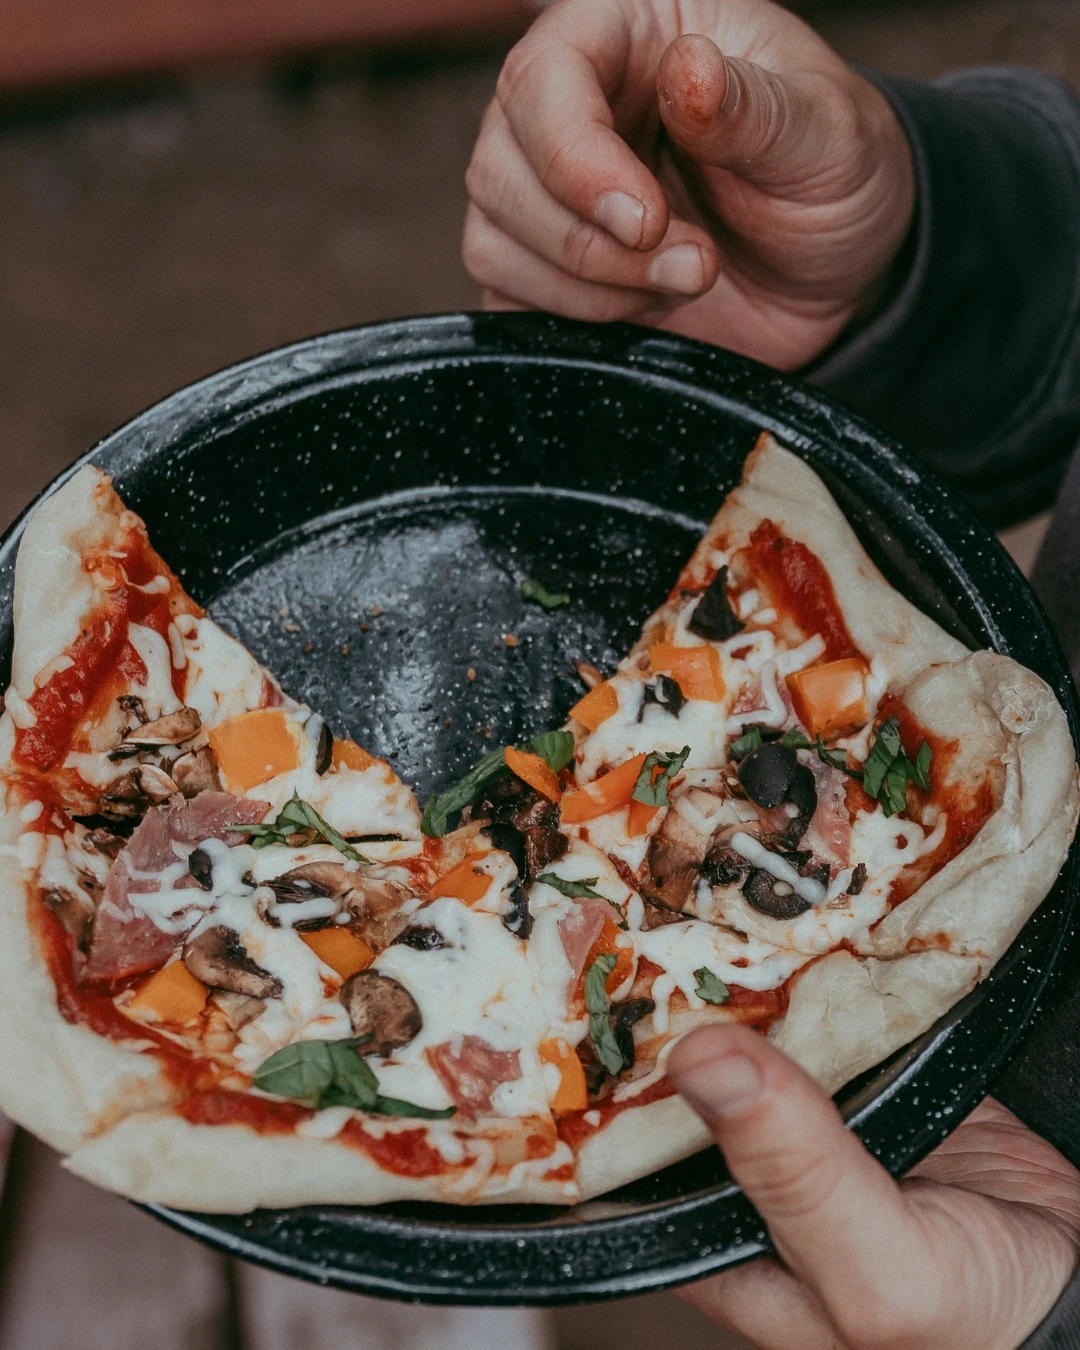
A cooked flatbread base lets you concentrate on melting the topping without burning the bottom.
Ingredients: 2 skillet-sized flatbreads, ½ cup thick pizza sauce, 1 cup shredded mozzarella, and ½ cup ready-to-eat toppings, such as sliced olives and roasted peppers.
Warm one flatbread, turn it over, and add half the sauce, cheese, and toppings. Cover and cook over low heat, checking underneath regularly. Repeat.
Drain wet toppings and spread the sauce thinly. If the bottom crisps before the cheese melts, take the skillet off the heat and leave covered briefly.
Use cooked toppings rather than raw meat. Keep cheese and opened refrigerated toppings chilled.
17. Warm Bean Walking Tacos
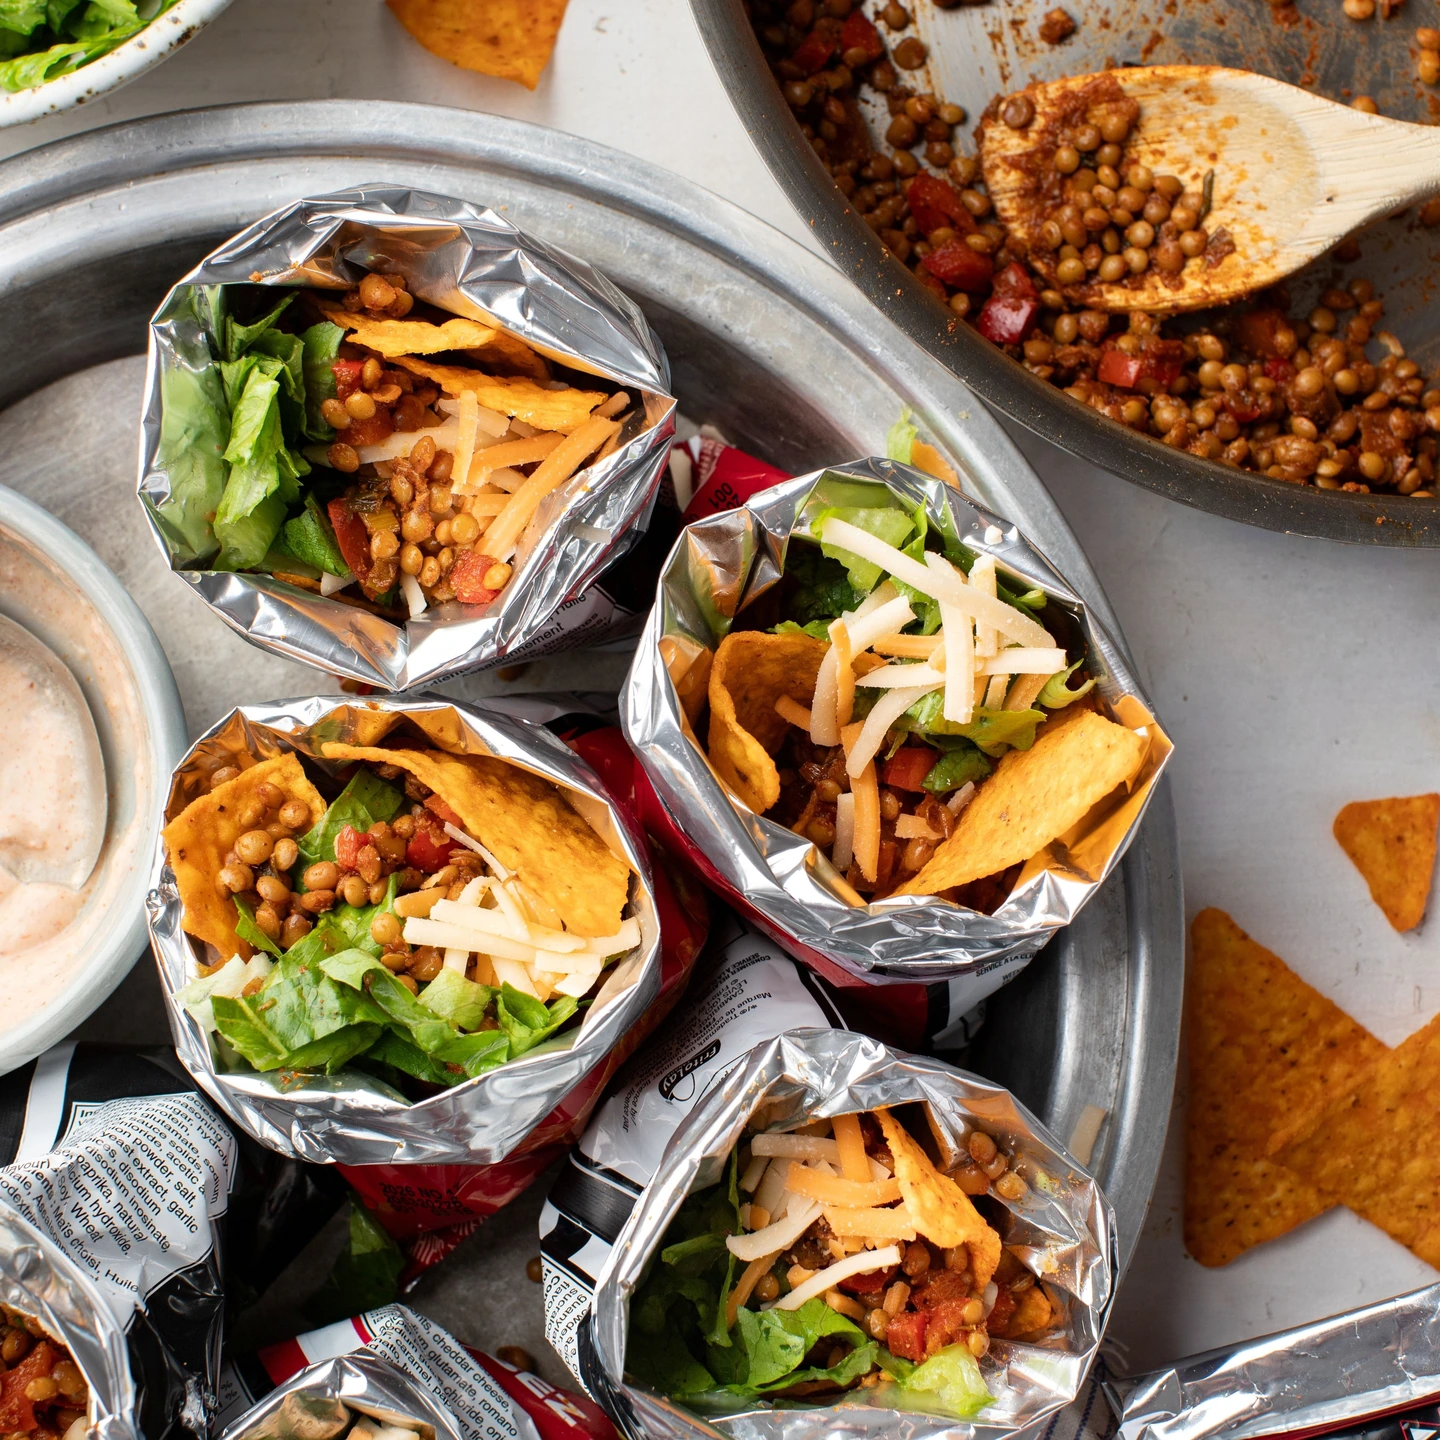
Serving these in bowls makes it easy to use a shared bag of chips.
Ingredients: 1 drained 15-ounce can pinto beans, ½ cup salsa, ½ teaspoon cumin, 2 tablespoons water, 3 ounces corn chips, ½ cup shredded cheese, and 1 cup shredded cabbage.
Heat the beans, salsa, cumin, and water in a small pot. Mash a few beans to thicken the mixture.
Divide chips between bowls and add the warm beans, cheese, and cabbage. Keep the chips separate until serving so they stay crisp.
For a cooler-free version, omit the cheese and cabbage, open the shelf-stable ingredients at mealtime, and eat immediately.
18. Lemon Couscous With Chickpeas and Raisins
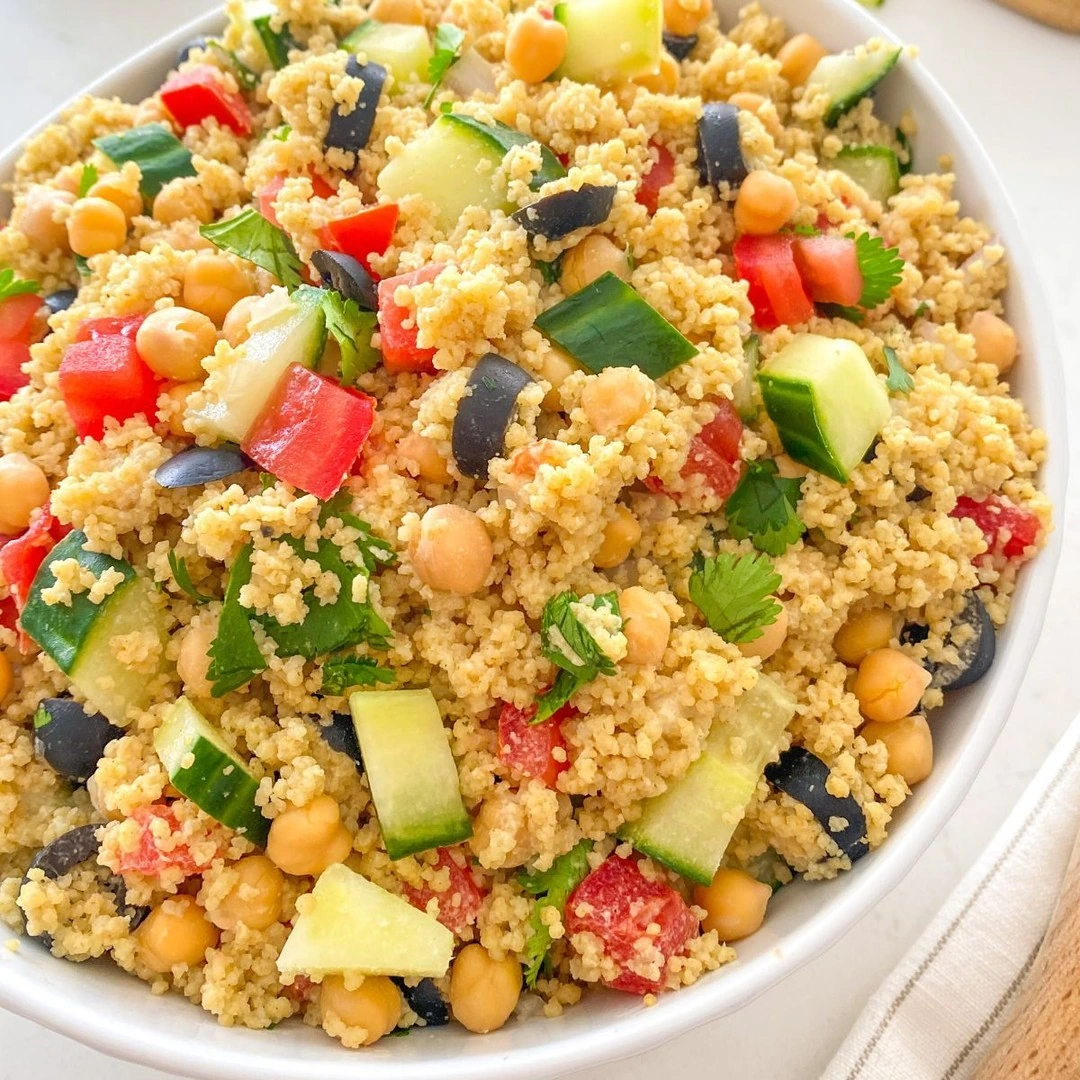
Choose small, quick-hydrating couscous for this meal. Pearl couscous requires a different cooking method.
Ingredients: 1 cup dry couscous, the hot water specified on its package, 1 drained 15-ounce can chickpeas, ¼ cup raisins, 2 tablespoons chopped almonds, 1 tablespoon olive oil, and 1–2 tablespoons lemon juice.
Hydrate the couscous according to the package. Fluff with a fork and fold in the remaining ingredients.
This meal uses little fuel and needs no draining. For backpacking, substitute appropriately prepared dehydrated chickpeas for the heavy can.
Use pumpkin seeds instead of almonds when suitable. For gluten-free meals, replace wheat couscous with a clearly labeled gluten-free alternative and follow its cooking instructions.
19. Halloumi and Pepper Pitas
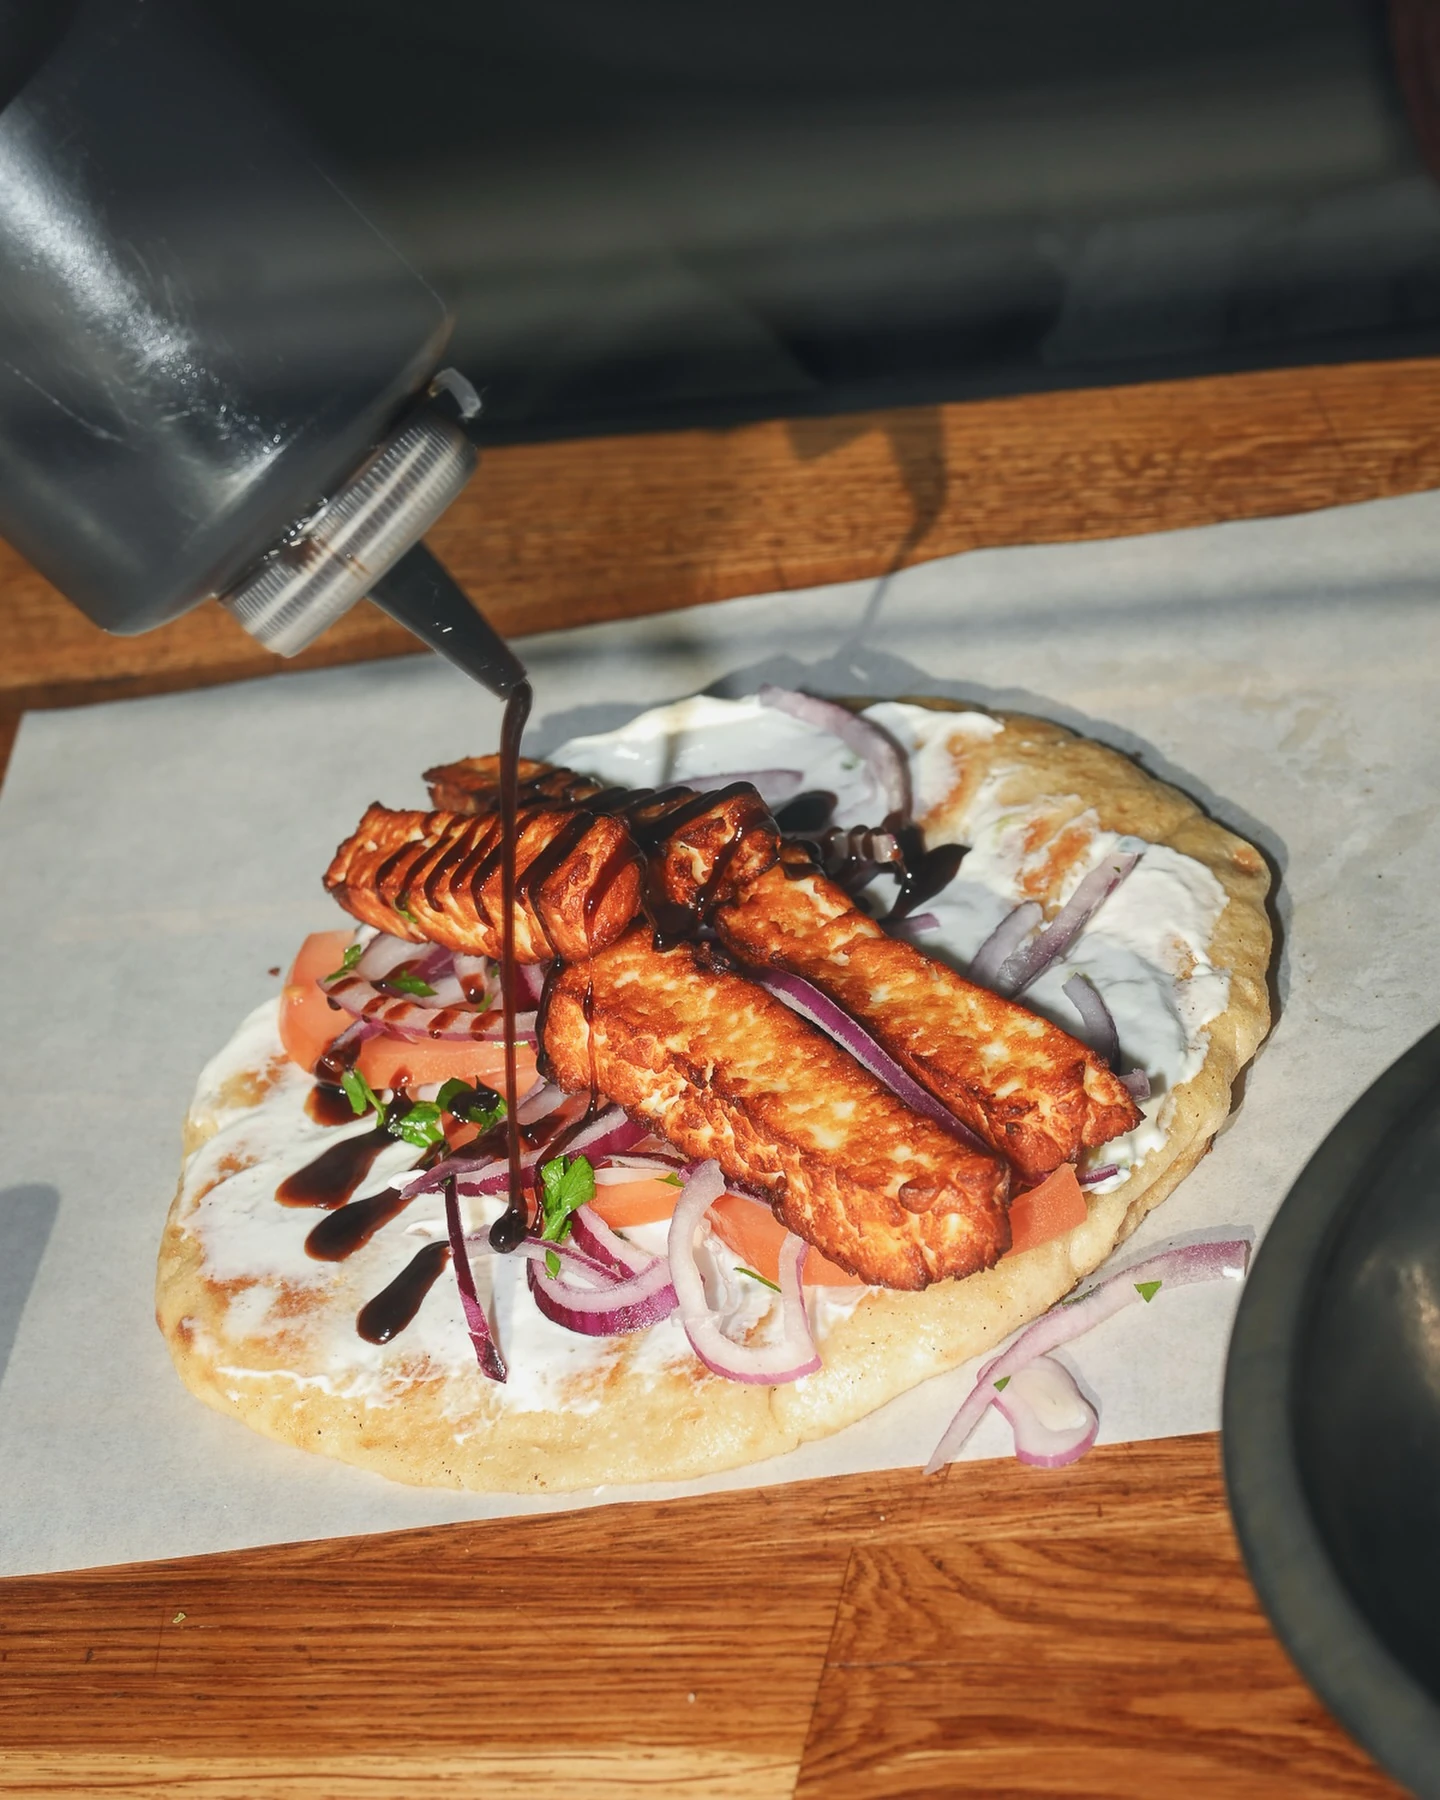
Cook the vegetables first so the browned cheese can go straight into the bread.
Ingredients: 8 ounces halloumi, 1 sliced bell pepper, ½ sliced onion, 2 pitas, 1 tablespoon oil, and 1 tablespoon lemon juice.
Heat half the oil and soften the pepper and onion. Set aside. Pat the halloumi dry, slice, and brown in the remaining oil for roughly 2–3 minutes per side.
Fill the pitas with cheese and vegetables, then add lemon juice. Taste before salting because halloumi is already salty.
Keep the cheese refrigerated. Firm tofu is a dairy-free alternative, but season it separately because it won’t supply halloumi’s saltiness.
20. Make-Ahead Chili With Tortilla Chips
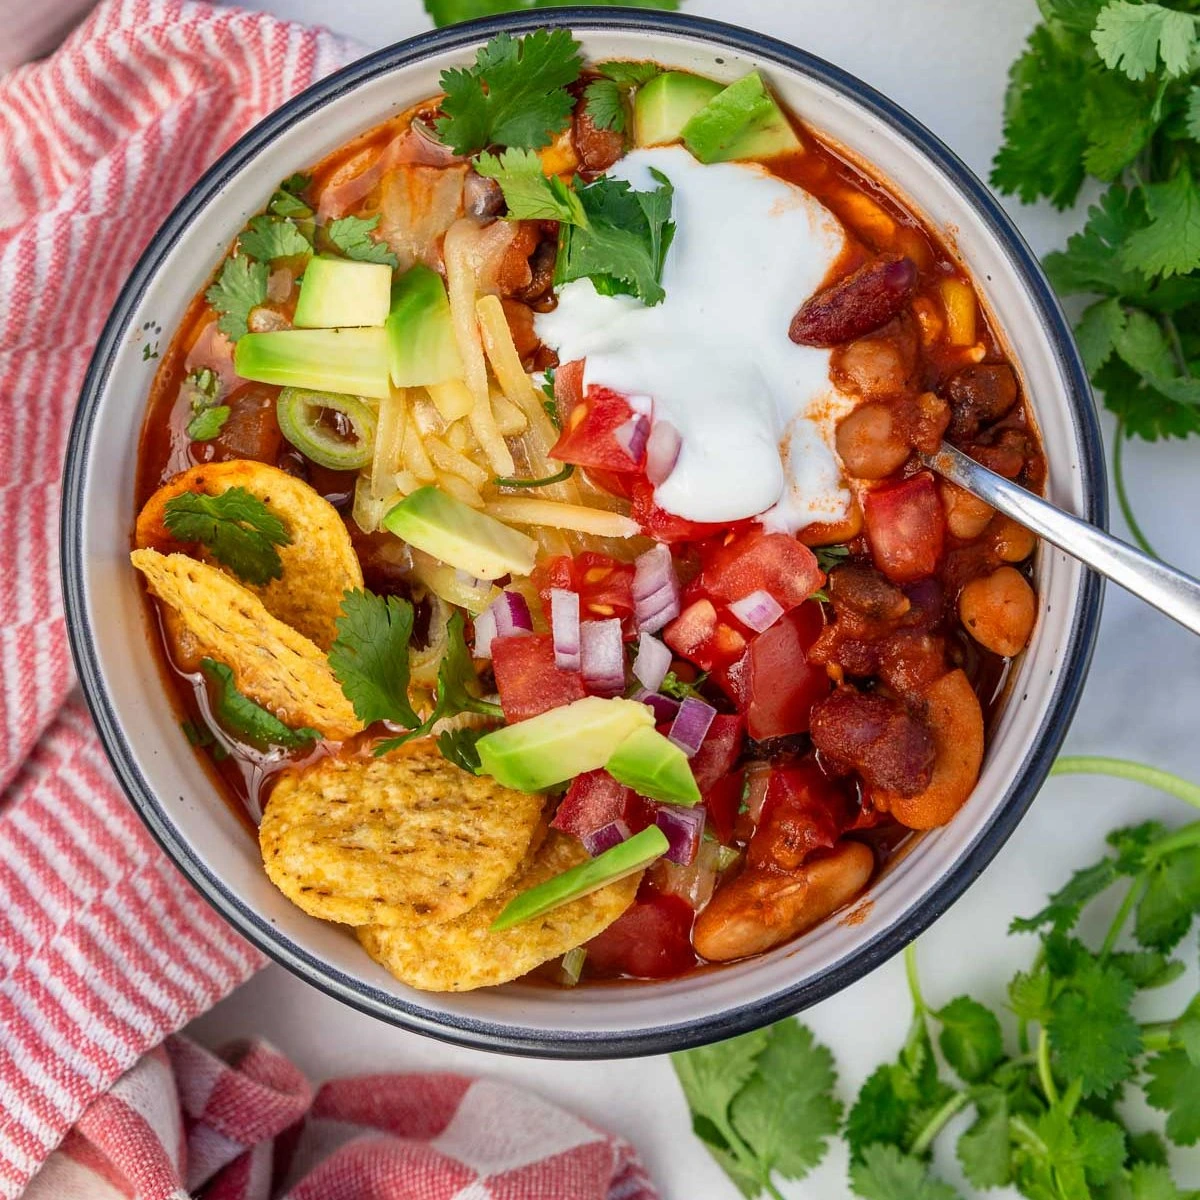
This is a practical first-night dinner when setting up camp takes longer than expected.
Ingredients: Approximately 4 cups cooked chili and 3 ounces tortilla chips for serving.
At home, divide cooked chili into shallow containers and refrigerate promptly. Freeze once chilled if transporting it frozen.
Thaw under refrigeration in a reliably cold cooler. At camp, transfer to a pot and warm gently, stirring frequently. Add water a tablespoon at a time if it catches or becomes too thick.
Reheat to 165°F throughout. A frozen center doesn’t prove the entire container has stayed safely cold.
Choose a bean chili for a vegetarian version, and check prepared chili labels for allergens.
21. Peanut Noodles With Cabbage
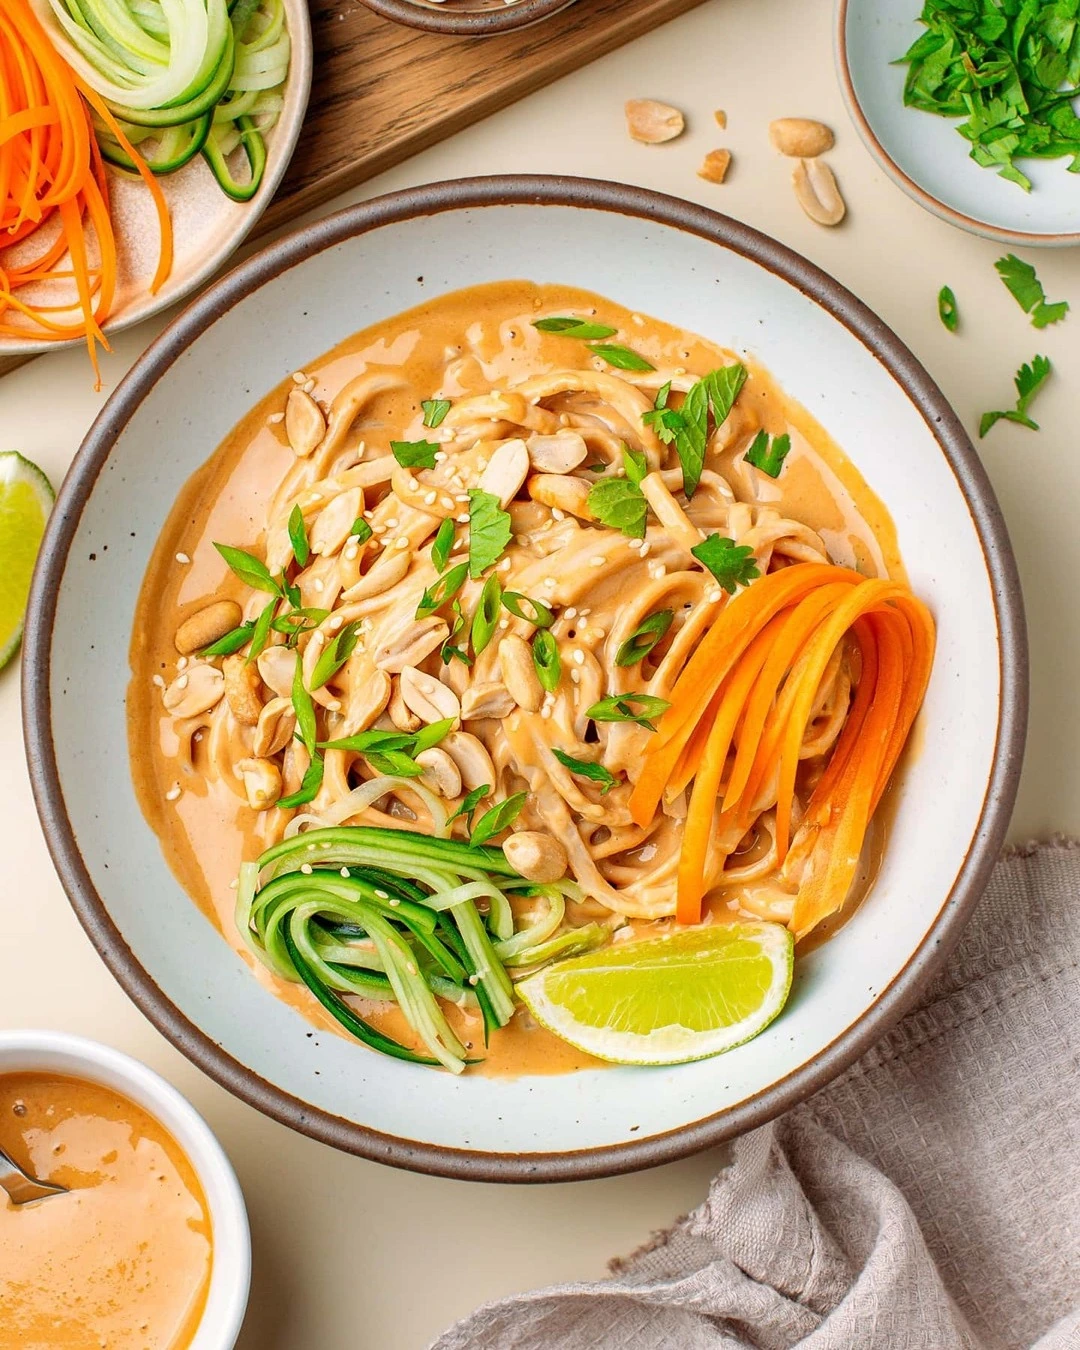
A quick peanut sauce gives noodles plenty of flavor without carrying several condiment bottles.
Ingredients: 6 ounces quick-cooking noodles, 2 cups shredded cabbage, 3 tablespoons peanut butter, 1 tablespoon soy sauce, 1 tablespoon lime juice, and chili sauce to taste.
Mix the peanut butter, soy sauce, lime juice, and a few spoonfuls of hot water into a pourable sauce.
Cook the noodles according to their package, adding cabbage during the last minute or two. Drain if required, then stir in the sauce.
Reserve a little cooking water before draining to loosen the finished noodles. Keep shredded cabbage chilled. Use rice noodles, gluten-free tamari, or sunflower seed butter as needed, checking all labels.
Camping Snacks, Sides, and Treats
22. Smoky Lime Corn
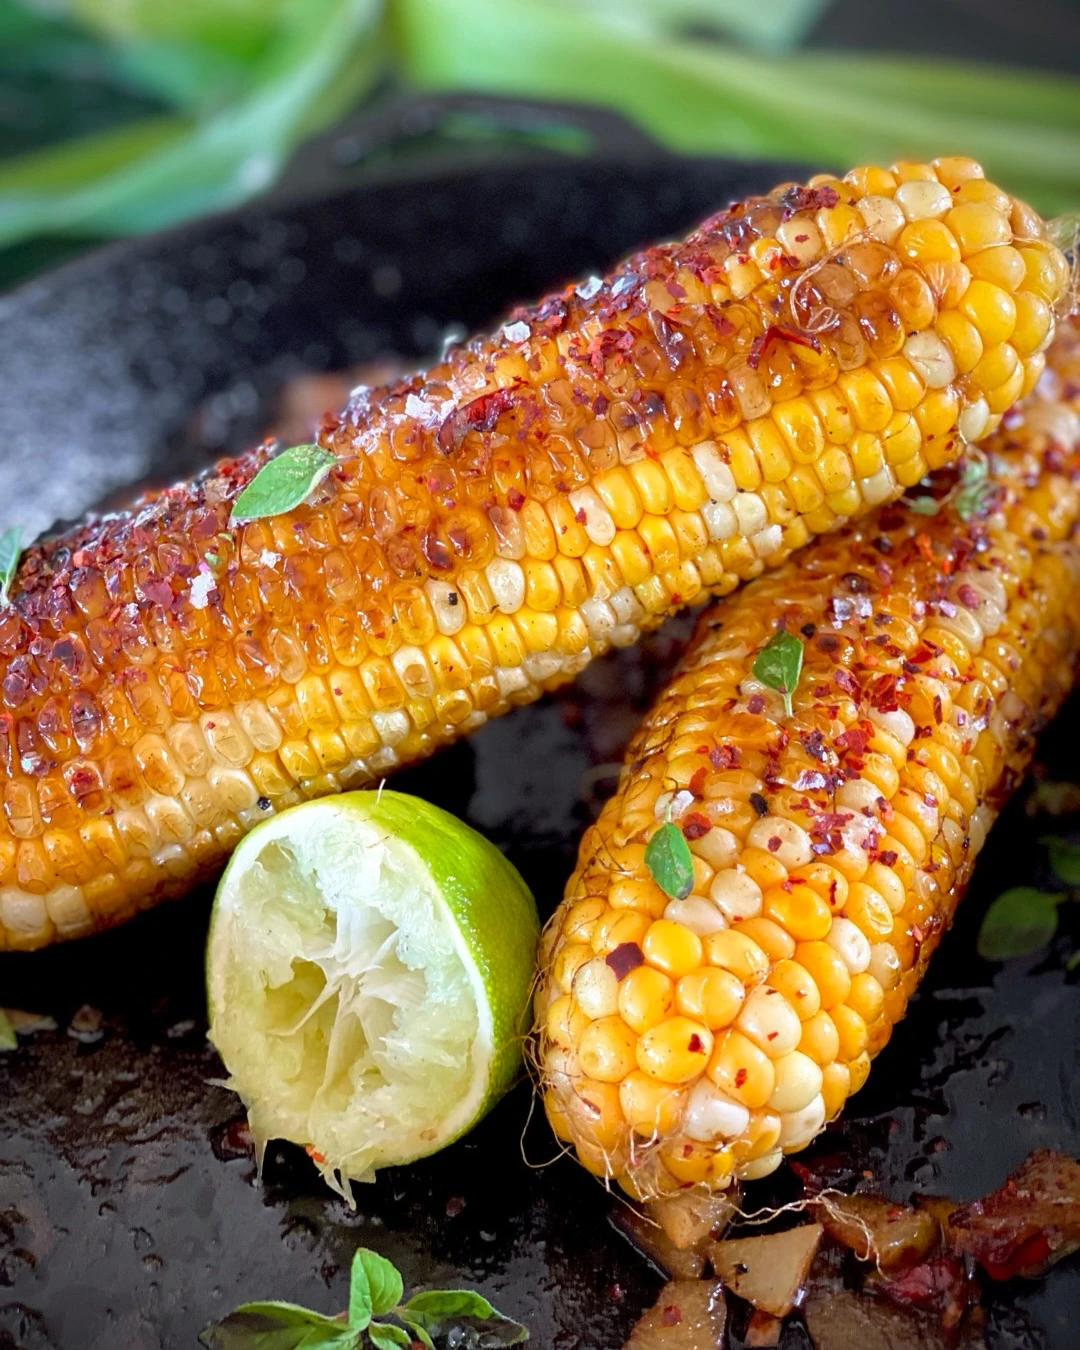
This simple side works with quesadillas, chili, or foil-packet dinners.
Ingredients: 2 ears of corn, 2 teaspoons oil, ¼ teaspoon smoked paprika, and ½ lime.
Coat the corn lightly with oil. Cook on a grate over moderate heat, turning regularly, until tender and browned in places, approximately 12–18 minutes.
Finish with smoked paprika and lime juice. Add salt to taste.
For a stove version, cut the kernels from the cobs at home and refrigerate them, then sauté in a skillet until tender. Whole ears take more room; prepared kernels save space but require cold storage.
23. Salty-Sweet Trail Mix
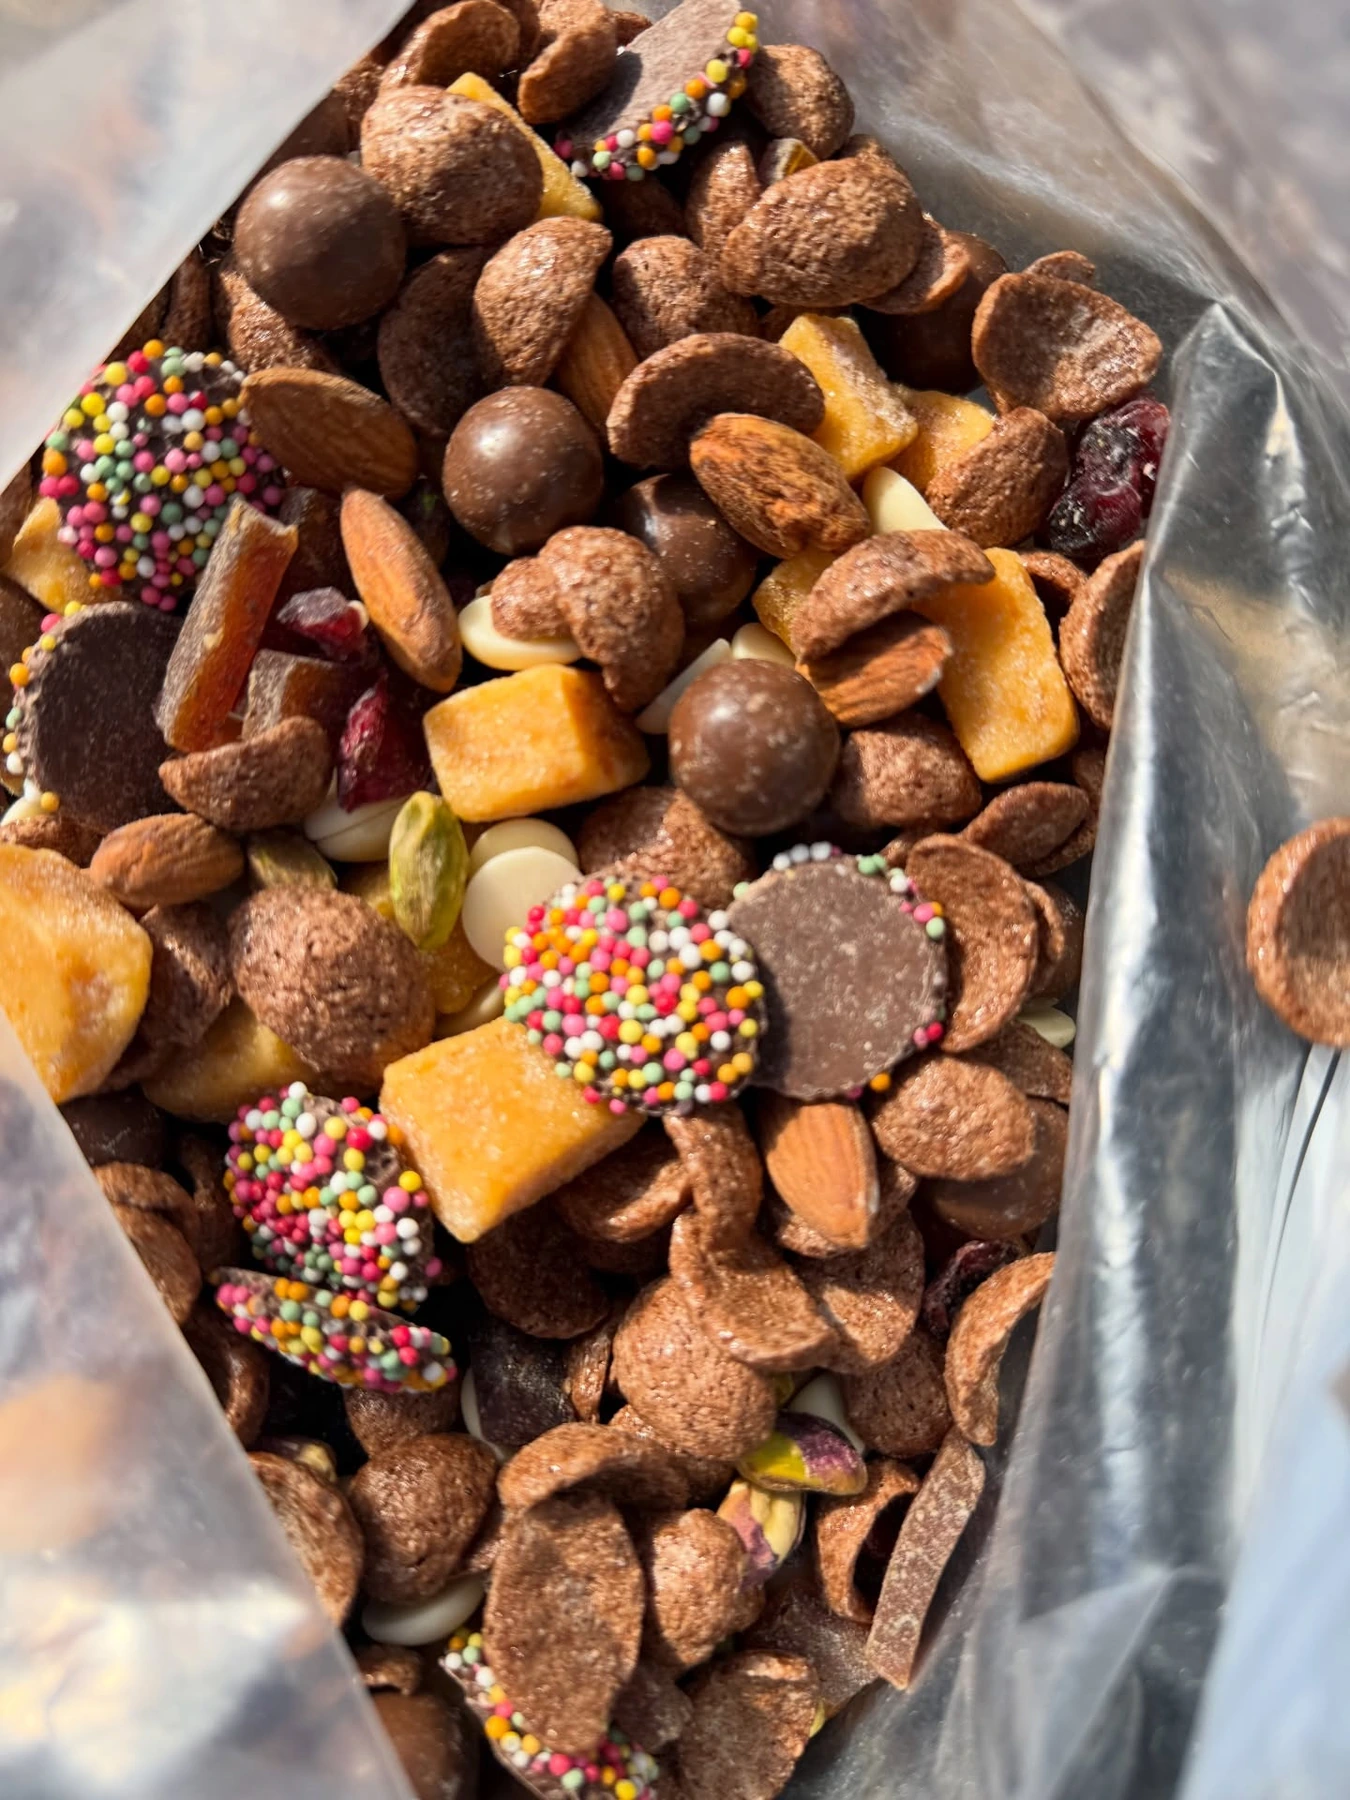
Make this around ingredients your group already likes, especially if it will be a regular hiking snack.
Ingredients for about six snack portions: 1 cup nuts or seeds, 1 cup pretzels, ½ cup dried fruit, and ¼ cup chocolate pieces.
Mix at home and divide into small containers. Keep dry and protected from heat.
For hot-weather trips, omit the chocolate or pack it separately so it doesn’t melt through the mixture.
Use appropriate seed and pretzel alternatives for dietary needs, checking labels and cross-contact information where relevant. This is a snack rather than a complete replacement for the trip’s main meals.
For food to eat on the drive to camp, see our road trip snack ideas and their packing suggestions.
24. Warm Cinnamon Apples With Granola
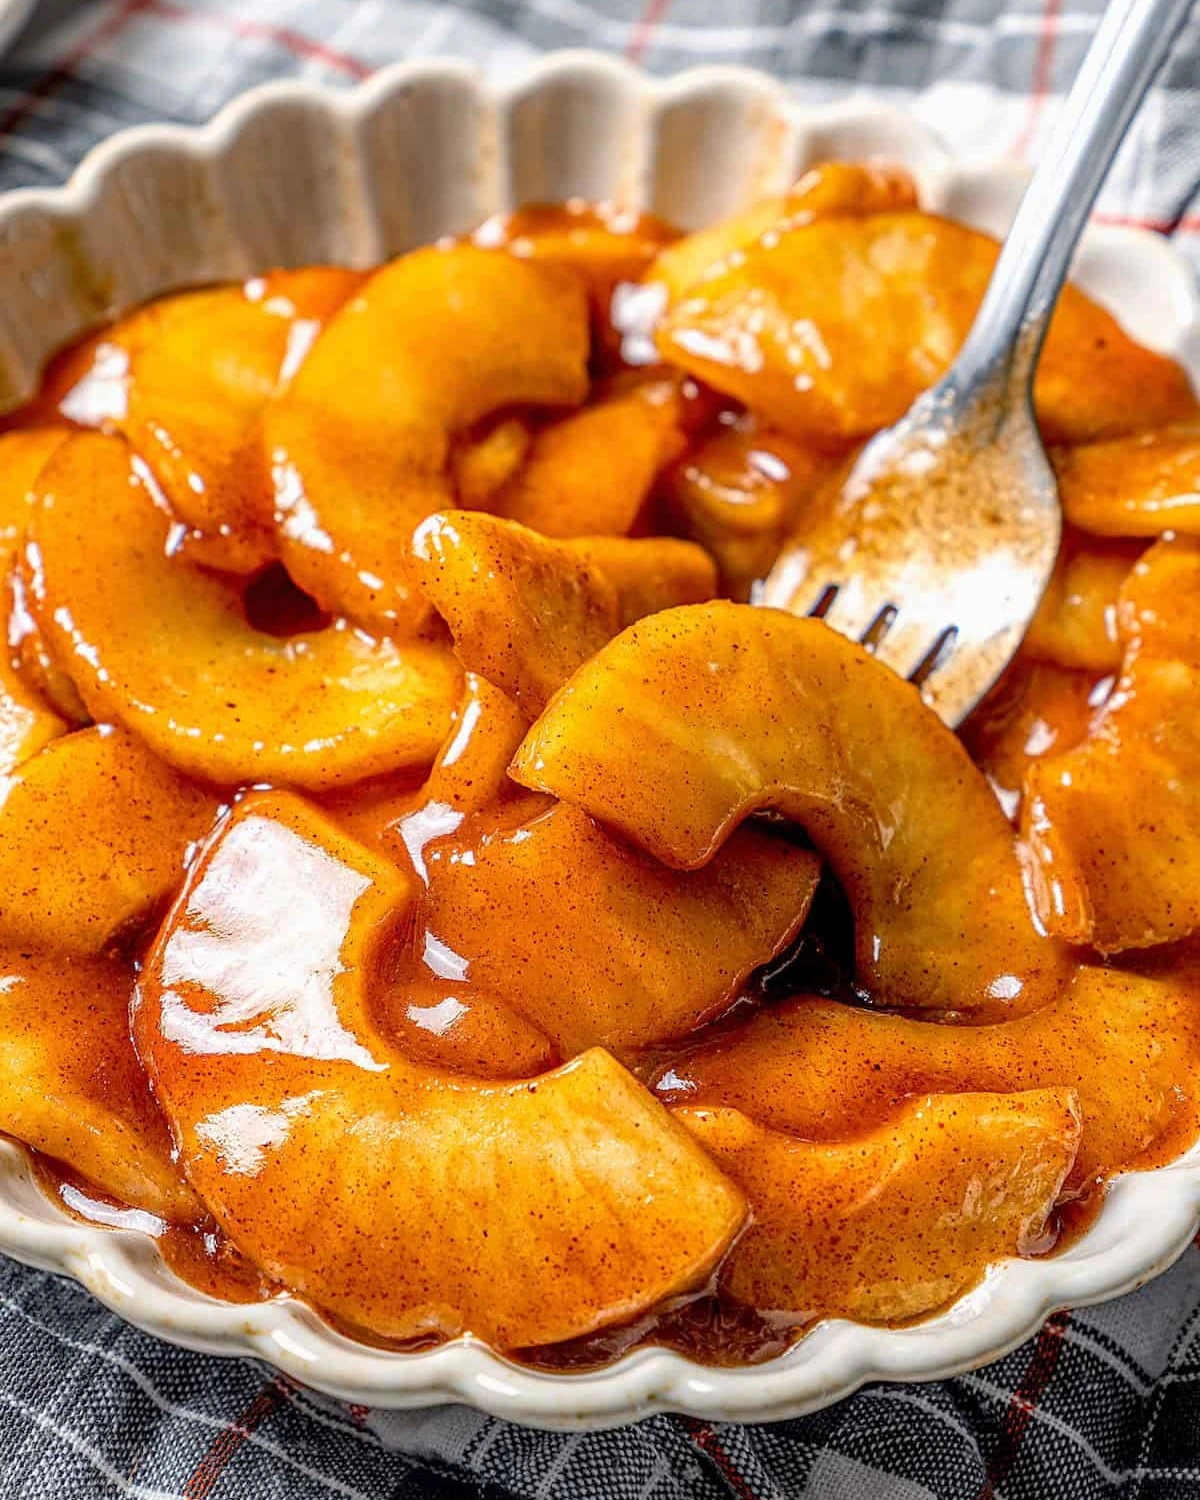
Adding granola after cooking gives you a crisp topping without making a separate crumble.
Ingredients: 2 thinly sliced apples, 1 tablespoon oil or butter, 1 tablespoon brown sugar, ½ teaspoon cinnamon, 2 tablespoons water, and ½ cup granola.
Combine everything except the granola in a skillet. Cover and cook over low to medium-low heat for approximately 10–15 minutes, stirring occasionally.
Add another spoonful of water if the pan dries before the apples soften. Divide between bowls and add granola immediately before eating.
Choose oil for easier storage and a dairy-free version. Use suitable gluten-free or nut-free granola when required.
25. Chocolate Banana Boats
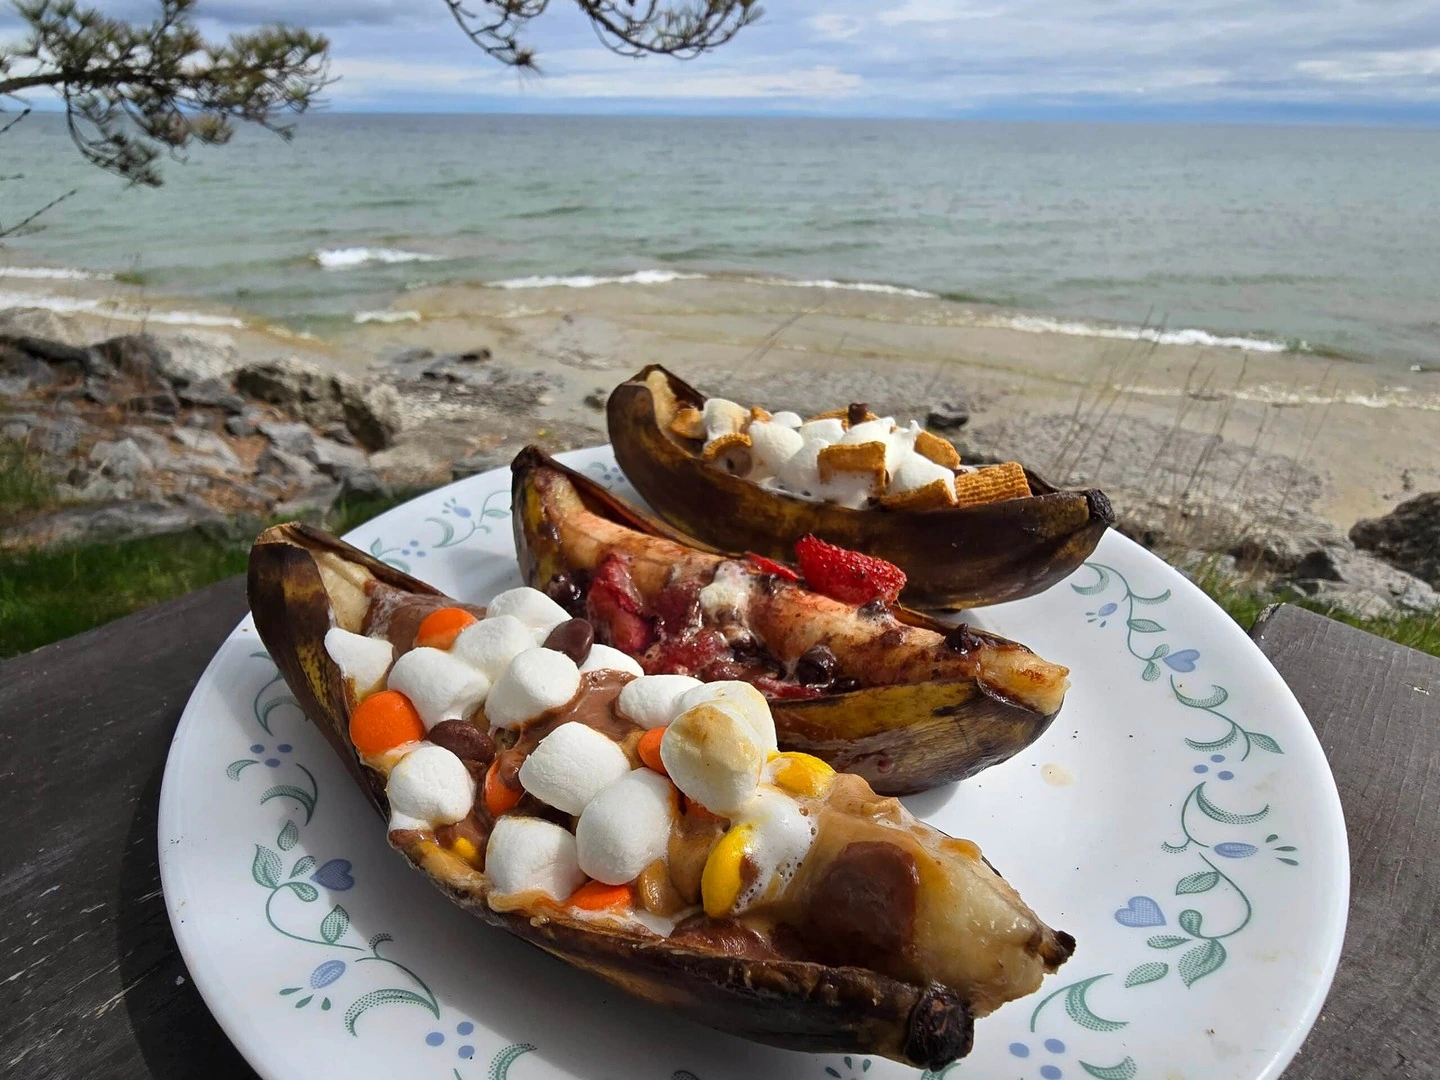
The banana peel holds the filling while it warms, making this an easy spoonable dessert.
Ingredients: 2 bananas, 2 tablespoons chocolate chips, and 2 tablespoons mini marshmallows.
Cut each banana lengthwise through the peel and into the flesh, leaving the underside intact. Open gently and add the toppings.
Wrap loosely in foil and warm on a grate over gentle heat for approximately 5–10 minutes, until softened and melted. Avoid direct flames, which can scorch the outside quickly.
For a stove version, peel and slice the bananas into a covered skillet, add toppings, and warm gently. Choose dairy-free chocolate and gelatin-free marshmallows if needed.
A Simple Two-Night Camping Menu
This menu serves two and shares ingredients across meals to keep shopping and packing manageable.
| Meal | What to serve |
|---|---|
| Arrival dinner | Make-ahead bean chili with tortilla chips |
| First breakfast | Egg and cheese English muffins |
| First lunch | Crunchy chickpea salad wraps |
| Second dinner | Black bean quesadillas with smoky lime corn |
| Dessert | Chocolate banana boats |
| Departure breakfast | Apple and peanut butter oatmeal |
| Snacks | Trail mix |
| No-cook backup | Peanut butter banana wraps |
If cooking becomes unavailable, use the backup wraps. They cover a meal for two without depending on a stove or fire.
Shopping List for Two or Four People
Quantities cover the menu above, including snacks and one backup meal. Buy package sizes as needed, then portion what you’ll take.
| Ingredient | Two people | Four people |
|---|---|---|
| Prepared bean chili | 4 cups | 8 cups |
| Tortilla chips | 3 ounces | 6 ounces |
| English muffins | 2 | 4 |
| Eggs | 2 | 4 |
| Sliced cheese | 2 slices | 4 slices |
| Shredded cheese | ¾ cup | 1½ cups |
| Large tortillas | 6 | 12 |
| Chickpeas | 1 × 15-ounce can | 2 × 15-ounce cans |
| Black beans | ¾ cup drained | 1½ cups drained |
| Tahini | 2 tablespoons | ¼ cup |
| Celery | 1 stalk | 2 stalks |
| Lemon juice | 1 tablespoon | 2 tablespoons |
| Salsa | ¼ cup | ½ cup |
| Ground cumin | ½ teaspoon | 1 teaspoon |
| Corn | 2 ears | 4 ears |
| Lime | ½ | 1 |
| Bananas, including backup meal | 4 | 8 |
| Chocolate chips for dessert | 2 tablespoons | ¼ cup |
| Mini marshmallows | 2 tablespoons | ¼ cup |
| Quick oats | 1 cup | 2 cups |
| Dried apples | ¼ cup | ½ cup |
| Peanut butter, including backup meal | 6 tablespoons | ¾ cup |
| Cinnamon | ¾ teaspoon | 1½ teaspoons |
| Cooking oil | 2 tablespoons | ¼ cup |
| Smoked paprika | ¼ teaspoon | ½ teaspoon |
| Prepared trail mix | 3 cups | 6 cups |
| Salt and pepper | Small portions | Small portions |
A 15-ounce can generally provides enough black beans for the two-person menu with some left over. Portion the required amount at home and refrigerate it, or open the can at camp and safely chill the remainder.
The oatmeal requires 2 cups of cooking water for two people or 4 cups for four. Bring additional drinking-quality water for drinking, handwashing, and cleaning; the total depends on your destination, weather, and facilities.
Pack the Cooler in Meal Order
Chill the cooler and ingredients before loading. Use sufficient ice or frozen packs and place a thermometer where you can check it easily.
Put later meals lower down and arrival food near the top. Keep prepared food in sealed, watertight containers so melting ice cannot reach it. If carrying raw meat, pack it separately from ready-to-eat food, ideally in a separate cooler.
Keep the cooler shaded and closed as much as possible. Take out only what you need for the meal.
For leftovers, use small, shallow containers and chill promptly. Keep the original preparation date in mind; taking food camping doesn’t restart its storage life. If you cannot cool and store leftovers safely, discard them. USDA’s camping food-safety guide covers cold storage, separation, and reheating.
Match the Menu to Your Water and Cleanup Supplies
Oatmeal, couscous, chili mac, wraps, and reheated chili are useful when washing facilities are limited. Pasta salad prepared at home also keeps a draining task out of camp.
For noodles that require draining, bring suitable equipment and follow campground instructions for disposing of cooking water. Don’t pour food scraps or greasy water onto the ground.
Scrape plates and pans before washing, collect food scraps with your rubbish, and use designated washing or wastewater facilities where provided. Foil packets reduce pan washing, but used foil still needs to be packed out or placed in an approved bin.
A basic kit for this menu includes a stove and fuel, a pot, a skillet, suitable lids, a spatula, tongs, a can opener, a knife, a cutting board, a food thermometer, and cleaning supplies.
Still choosing where to camp? Compare campground and RV-park listings, then confirm the pitch or accommodation type, water access, cooking rules, and cleanup facilities with the property.
Essential Camping Food Safety
Keep perishable food at 40°F or below. Discard it if left above safe cold temperatures for more than 2 hours, or 1 hour when the temperature exceeds 90°F. Wraps, salads, and prepared meals still need chilling when they contain perishable ingredients. USDA’s outdoor food-safety advice explains these limits.
Use a thermometer when cooking meat: 165°F for poultry, 160°F for ground beef, and 145°F followed by a three-minute rest for whole cuts of beef, pork, lamb, and veal. Reheat leftovers to 165°F. USDA’s camping guide provides the temperature guidance.
Follow your destination’s rules for storing food, rubbish, and scented items. Use required lockers or approved wildlife-resistant containers, and keep food out of sleeping tents. Consult the National Park Service’s camp-cooking guidance alongside local instructions.
Frequently Asked Questions
What are the easiest camping meals for beginners?
Oatmeal, chickpea wraps, quesadillas, and make-ahead chili are good starting points. They use familiar methods and involve few cooking stages. Pack a no-cook backup so a delayed arrival doesn’t leave you dependent on setting up the stove.
Our easy camping meals guide also includes a two-night menu and a shopping list for two.
Which camping foods work without refrigeration?
Dry oats, nut butter, tortillas, crackers, dried fruit, nuts, couscous, and unopened shelf-stable cans or pouches are useful choices. Follow package instructions after opening and prepare only what you can eat if refrigeration is unavailable.
How can you make camping food cheaper?
Choose meals that share ingredients and portion them before shopping. Tortillas can cover wraps and quesadillas; cheese works for breakfast and dinner. Avoid buying a different sauce or topping for every meal.
How much food should you pack?
Count each person’s breakfasts, lunches, dinners, and snacks, then include a practical backup. Use the recipe portions as a starting point and adjust for appetite and planned activity. For groups, check pan size as well as ingredient quantities: more food often means extra cooking batches.